• Home
  • Curls
  • Beauty
    • Makeup
    • Skincare
    • Nails
  • Style
  • Lifestyle
    • Pregnancy
  • Videos
  • Contact
  • Resources
    • FREE Curly Hair Product Tracker
  • YouTube
  • Shop
    • Amazon
    • Etsy
    • Teespring Store
    • ObsessedWith.It
  • Links
  • 0
DiscoCurls
Curls. Beauty. Lifestyle.
Category:

Blog

Temporary Highlights With Hair Flash Color

by Rochelle July 20, 2017

This post contains affiliate links, including my Hair Flash Color referral link. I may earn a small commission each time someone makes a purchase through one of my links, which helps to support my blog. Additionally, this product was sent complimentary of Hair Flash Color. All opinions are honest, my own and I’m so excited to share them with you. 

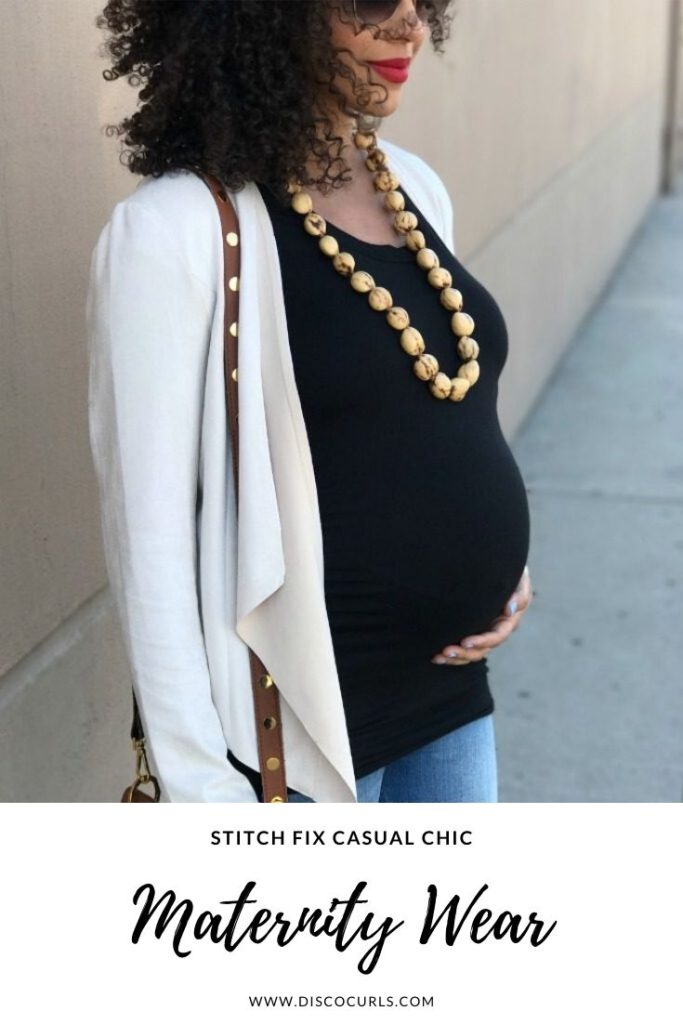
Since having my little one, leaving the house can be a challenge. I’ve desperately been looking for a new look but haven’t had a minute to myself. With the weather warming up, I thought adding temporary highlights would be a quick way to change up my hair in minutes. Unfortunately, not all temporary color is created equal. Hair chalks don’t last on my hair and most colored hair sprays leave my curls crunchy. Luckily, I’ve discovered Hair Flash Color which has completely changed my opinion on temporary color.

What Is Hair Flash Color?

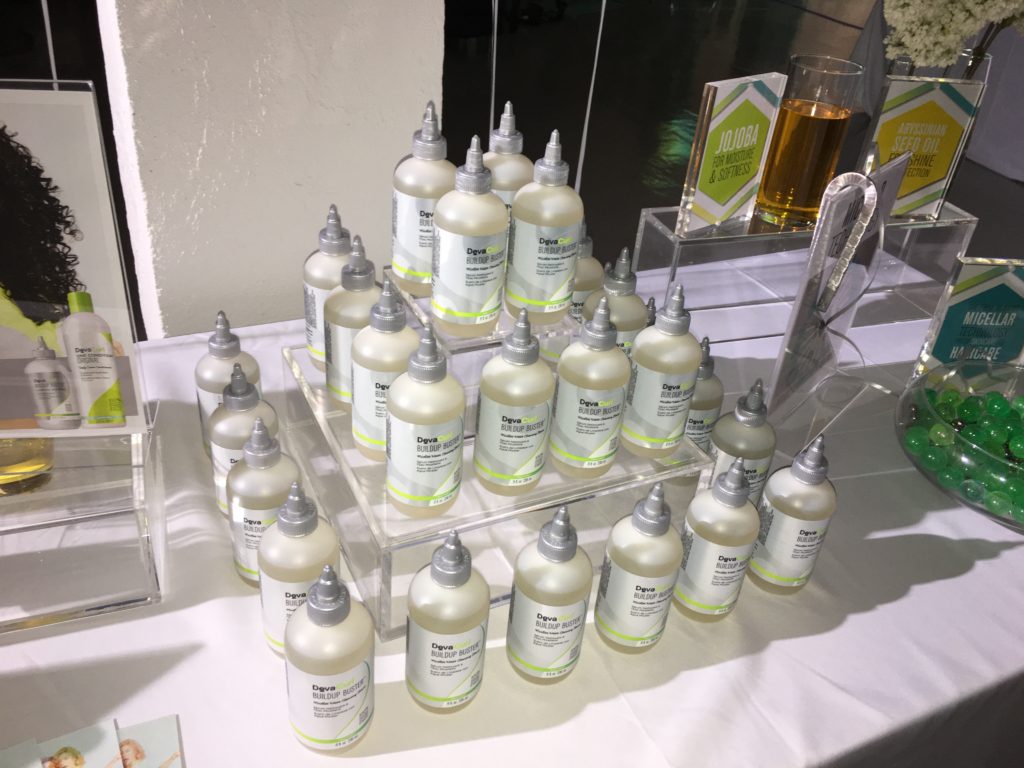
Hair Flash Color is a 2-in-1 temporary hair color and hair care formula that contains antioxidants, UV protection, hydrating natural ingredients, and natural mineral pigments. It can be used to add temporary highlights, touch up and cover roots, add a new color, and protect and nourish the hair. Plus, it washes out in one shampoo making it perfect for special occasions.

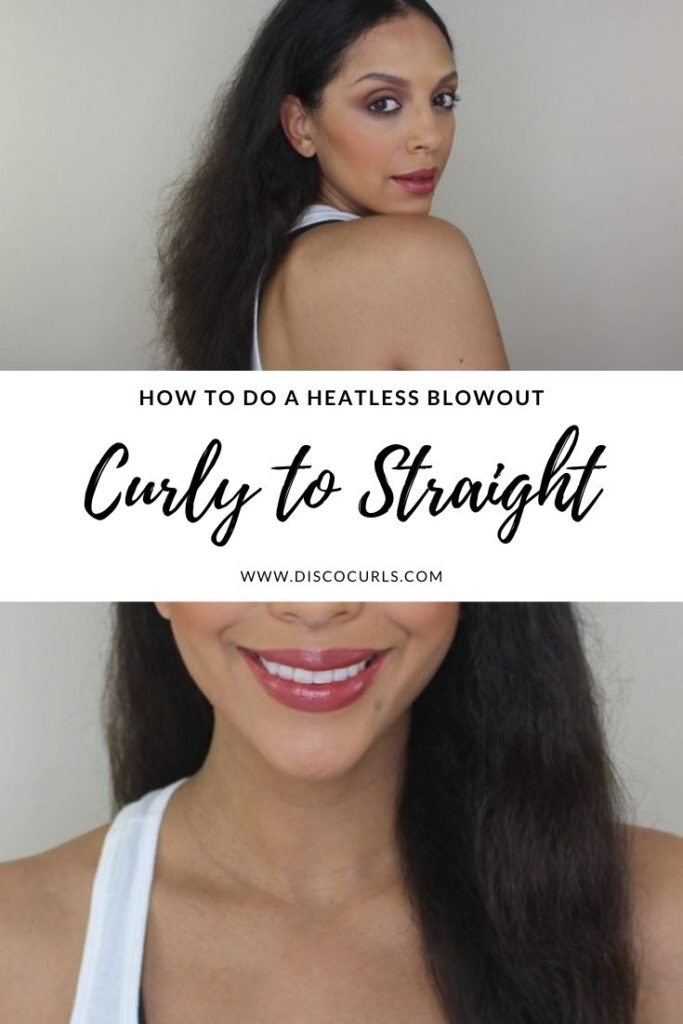
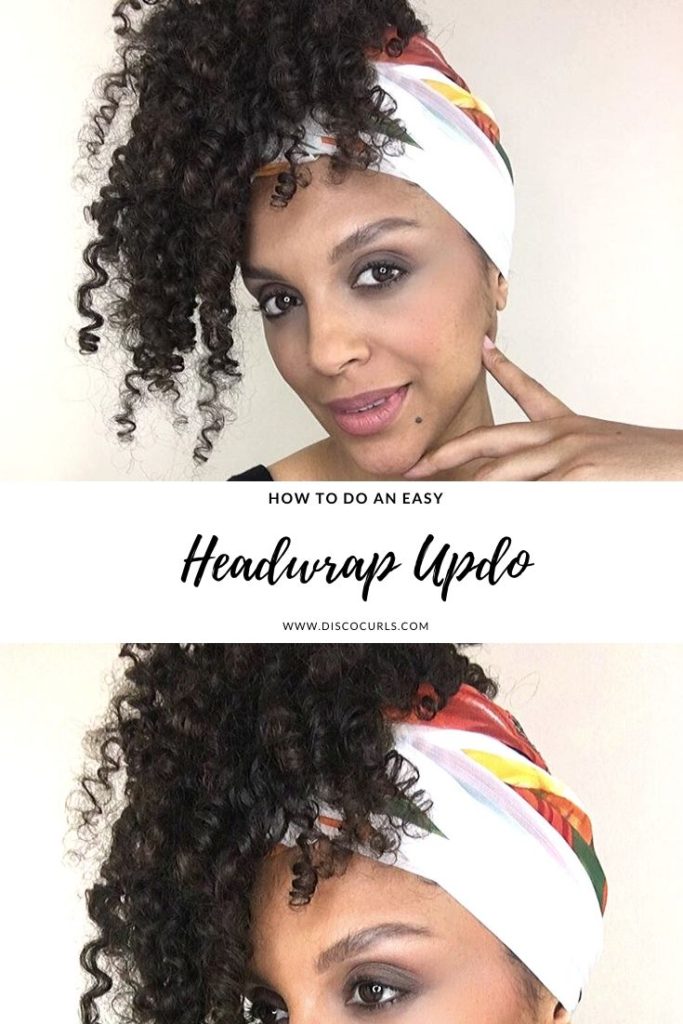
How To Get Temporary Highlights With Hair Flash Color

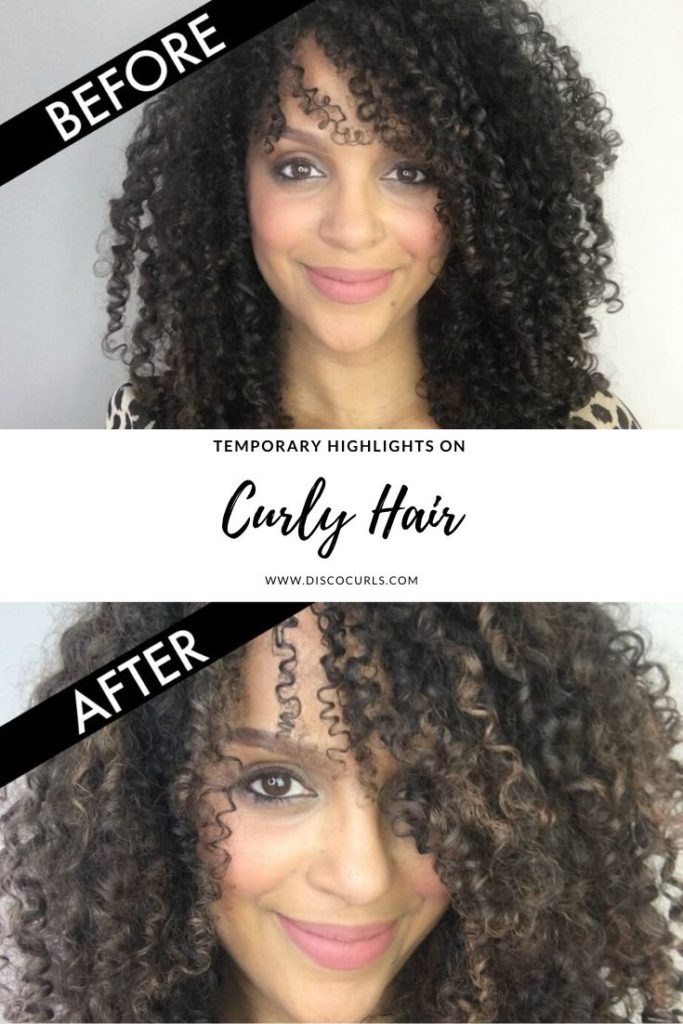
To get natural looking highlights, choose a shade that is 1 to 2 shades lighter than your hair color. For my dark brown hair, the shade Light Brown worked best. Cover shoulders with a towel or cape. Section off the top half of your hair and secure with an elastic or clip. Shake the can well and spray the tips of your ends on the bottom section. Release the elastic or clip from the top half and spray random sections of hair to create natural highlights.

Hair Flash Color Temporary Highlights

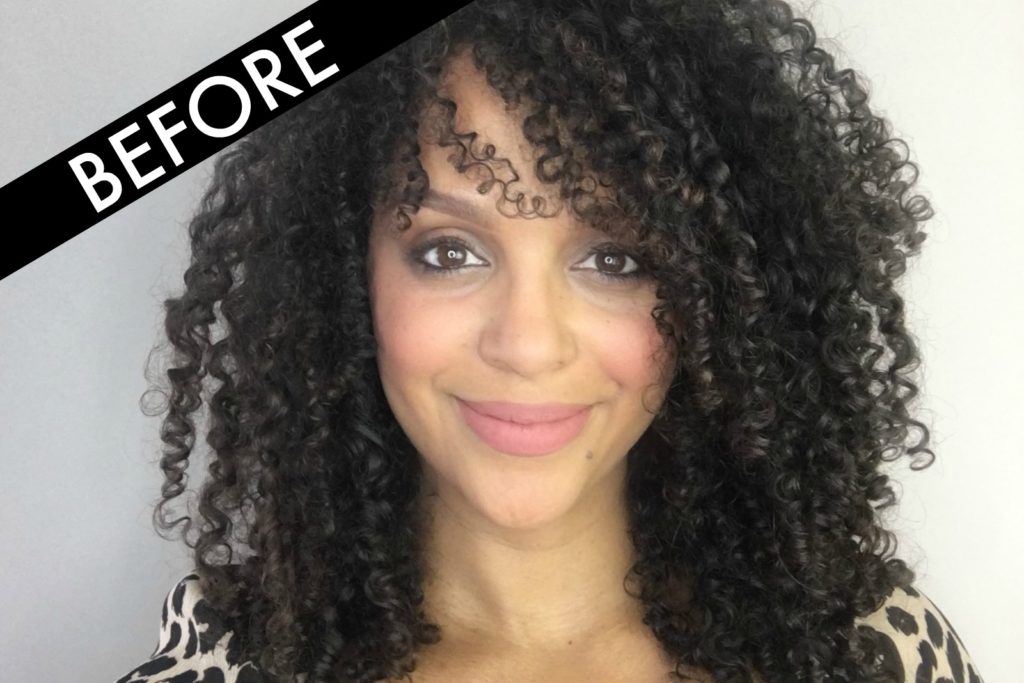
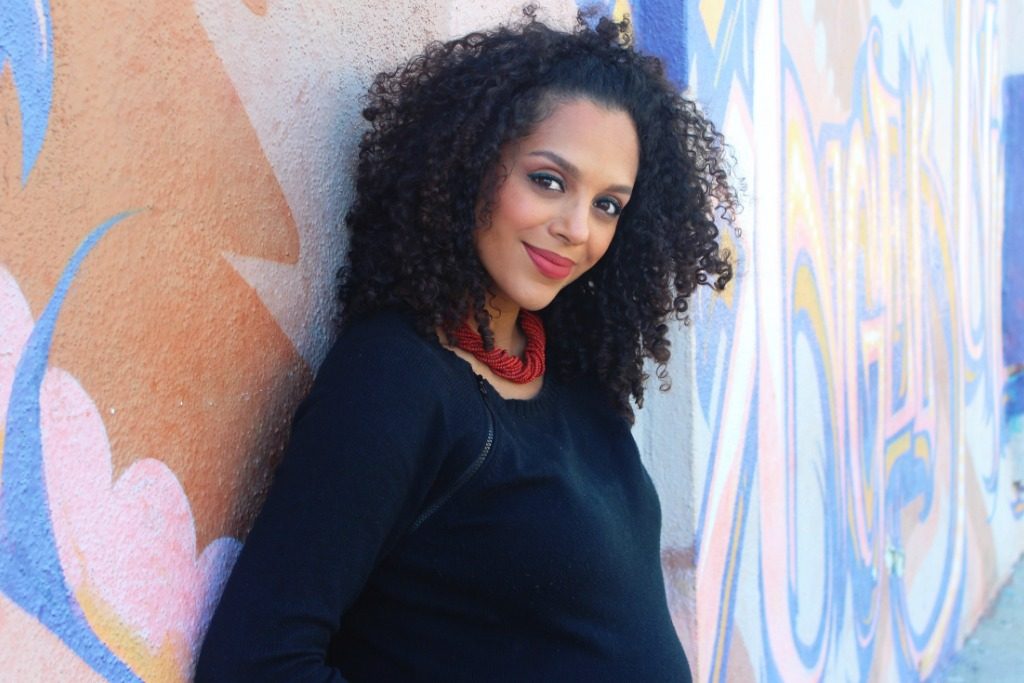
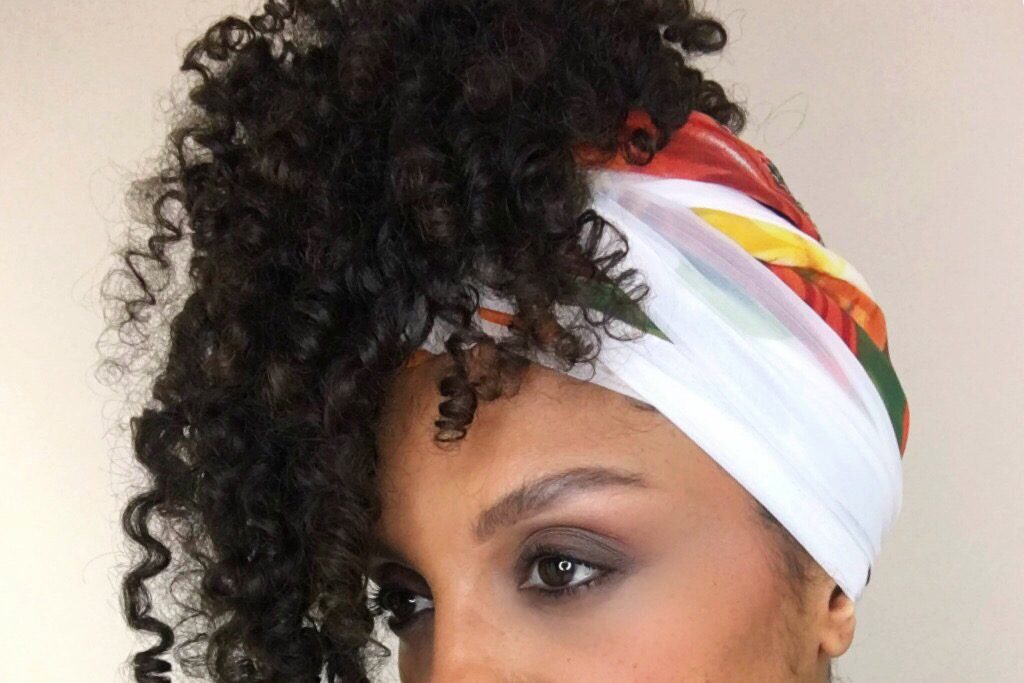
My hair before Hair Flash Color

To my surprise, my hair was soft to touch and after letting it dry it didn’t rub off on my clothing. This has been my favorite temporary color to date and my only suggestion to this company is to create a larger sized can for more use.

Hair Flash Color Temporary Highlights

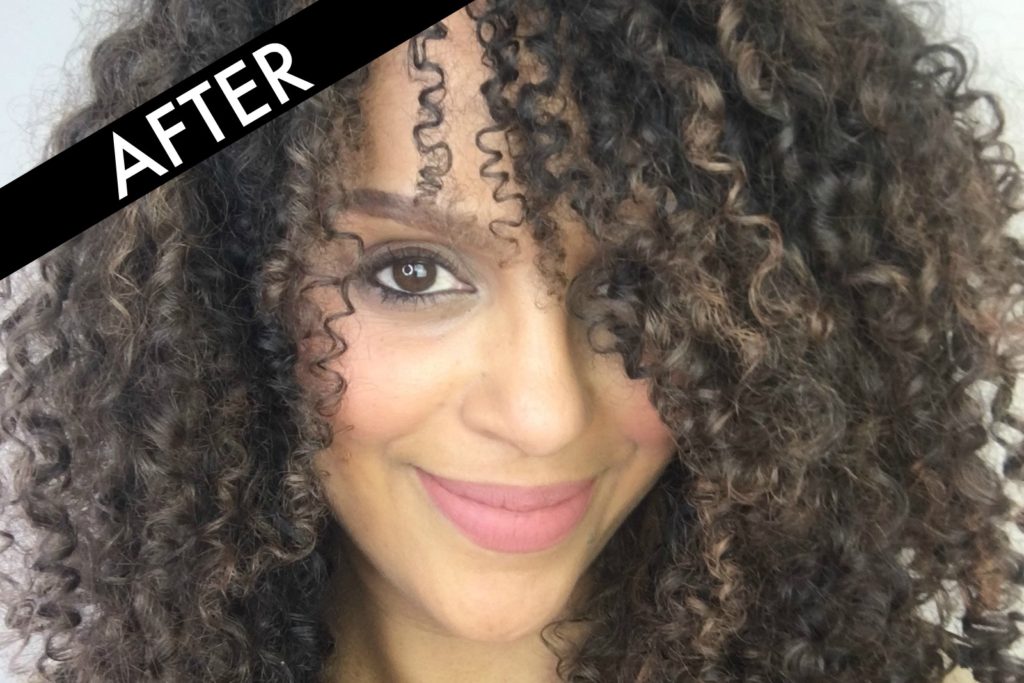
My hair after Hair Flash Color

Watch the Full Tutorial Here:

What are your thoughts on this color? Let me know down below in the comments.

Want to try Hair Flash Color? Use my discount code for 10% off your next purchase: B10DISCO

Visit http://www.hairflashcolor.com

Visit Hair Flash Color YouTube here

temporary highlights on curly hair

0 comment
2 FacebookTwitterPinterestEmail
Group photo from the Mazda Field Trip #WeAllGrow

#WeAllGrow Summit Long Beach, CA 2017 Recap

by Rochelle April 23, 2017

Last month I had the pleasure of attending the #WeAllGrow Latina Summit in Long Beach, CA. As silly as it sounds, I felt a bit nervous attending as a non-latina but my good friend Rocio Mora of RisasRizos.com assured me that everyone was welcome. The summit was an amazing 3 days of listening to influential speakers, networking, courses, and one incredible field trip.

What is the #WeAllGrow Summit?

According to their website, the #WeAllGrow summit is the go-to professional conference for Latinas in the digital space. As the audience was primarily women (with just a sprinkle of men), it was comforting to be surrounded by so many powerful, inspiring people. At any point, you could be rubbing elbows with top executives and entrepreneurs as well as your favorite blogger and influencer.

#WeAllGrow Latina Welcome Party

Photo Credit: Robson Muzel. My Curl-Friends Jeshua Vivieros, Rocio Mora, Ada Rojas

What made this entire experience special was that everyone was there to experience growth whether that was within their own business, blog, or relationships. It was genuine, uplifting, and not once did it feel catty. I overheard someone use a phrase that really resonated with me, “There’s enough sunshine for everyone”. It’s safe to say that, that phrase set the tone for the weekend.

Day 1: Field Trip with Mazda

Our first day was spent on a field trip. There were several field trip options but WAG (#WeAllGrow) purposely pairs you up with the brand that best fits your lifestyle. They might be mind readers because the Mazda field trip was exactly what I was hoping for considering my husband and I just purchased a Mazda CX-5!

The day was spent testing out several of the Mazda 2017 models including the spacious CX-9, CX-3, Mazda 6, Mazda 3 and the sporty MX-5 (Miata). We began our trip from Hotel Maya in Long Beach and explored the coastal region of California down to Palos Verdes. After visiting each destination, we switched cars to truly feel the way each car handled along some of the innovative technology the new models offered.

Group Photo for Mazda Field Trip at the #WeAllGrow Summit

Photo Credit: Carley Hummel. Coastal Views on the Mazda Field Trip

Some of our stops included the South Coast Botanical Gardens, Roessler Point in Palos Verdes and finished at the beautiful Terranea Resort in Rancho Palos Verdes. We were swept away at the Terranea Resort to a private dining area to have lunch and meet Teresa Spafford. At Mazda’s North American Operations she is the design manager for colors, materials and finishes, and advanced design planning. We learned her history and her inspiring story of evolution within Mazda.

The Terranea Resort Entrance for the Mazda Field Trip

The Glamorous Entrance of the Terranea Resort

After lunch, we went ocean side to paint…something I hadn’t done since I was a child. It was pleasantly therapeutic and I didn’t do half-bad! The grand finale was a wine and chocolate pairing that looked amazing but I could only half partake in as I was 6 months pregnant (Find out more about my pregnancy here). The chocolate was amazing though! Fortunately, after such a long day our DriveShop operators drove us safely back to our resort.

Days 2 & 3: Keynote Panels, Courses & Networking

The next two days were spent at Hotel Maya filled with keynote panels, breakout sessions, and networking events. Throughout each day we experienced inspiring keynote panels hosted by several speakers, entrepreneurs, bloggers, influencers, and celebrities. In addition, there were plenty of breakout sessions that offered specialty courses for growth. The topics included building professional websites for your business, DSLR and photography tips, expert blogging tips, generating income, building your brand and much more.

In between the keynote panels and specialty courses, there were networking breaks that gave us a chance to visit with many of the sponsors in their individual suites. I was able to visit several of the suites including Neutrogena, Aveeno, Johnson’s Baby, Stitch Fix, Narciso Rodriguez, Chase Slate, Wordpress, Mazda, and TurboTax. These visits gave us a chance to finally meet some of the contacts for these brands and develop relationships for future collaborations.

Most importantly, these days introduced us all to like-minded individuals all working hard to attain growth within ourselves. Even though I had my initial concerns about not being Latina…everyone was so welcoming and never made me feel out of place. It truly harnessed the energy of the sisterhood that connected us all.

Watch my vlog from #WeAllGrow Latina Summit 2017:

Have you ever attended the #WeAllGrow Summit? What are some of your other favorite digital conferences for women? Let me know down below in the comments.

0 comment
0 FacebookTwitterPinterestEmail
Dolce Cabo Brule Faux Suede Jacket

#Slayternity: Stitch Fix Casual Chic Maternity Wear

by Rochelle April 9, 2017

This post contains affiliate links, including my Stitch Fix referral link. I earn a small commission each time someone signs up for Stitch Fix or makes a purchase through one of my links, which helps to support my blog. Additionally, this month’s fix was sent complimentary of Stitch Fix. All opinions are honest, my own and I’m so excited to share them with you. 

As my due date quickly approaches, my clothing selection has officially slimmed down. Why? Because my body’s growing and I’m running out of options. #Slayternity means nothing if I can’t pull something together and with 5 weeks left,  purchasing new maternity clothing will be short-lived. Luckily, there is Stitch Fix, a personal style service that evolves with your taste, needs, and lifestyle.  All it takes is a few minutes to fill out your style profile and you are one step closer to a delivery filled with stylish pieces to match your wardrobe.

How Stitch Fix Works

Before anything gets sent your way, you fill out a style profile that asks several questions to help determine what pieces will be best for you. These questions cover everything from your sizing, shape, style, budget and lifestyle to help your stylist pick the best options. A total of 5 items will be added to your fix.

Next, pick a delivery date from their calendar. Once your stylist has picked your items, a styling fee of $20 will be charged that can be applied as a credit toward anything you’d like to keep from your shipment.

When your fix arrives, you have 3 days to try everything on and decide what you’d like to purchase or what you’d like to send back. The beauty of this is that you are only charged for the items you’d like to keep during checkout. Stitch Fix clients receive free shipping both ways and a 25% discount if all 5 items are purchased.

My Casual Chic Maternity Fix
Stitch Fix

Market & Spruce Sollas Maternity Knit Top

Because my body is in a state of growth, my style profile focused on comfort. What I love about the Stitch Fix website is that it caters to all body types, including maternity. After receiving my box in the mail, I was happy to see items that I knew would work for me. I thought I’d share my top items from my fix, one being a black Sollas Maternity Knit Top by Market & Spruce because of its simplicity and fit.

It was easy to add the Dolce Cabo Brule Faux Suede Jacket right on top to take it from casual to chic. The texture of both the top and jacket were soft and lightweight, a bonus for my ever-changing body temperature. With these two simple pieces, I was able to add a chunky necklace from my personal collection to dress up the look.

Stitch Fix

Dolce Cabo Brule Faux Suede Jacket

The Maternity Liza Distressed Skinny Jean by Lila Ryan were right up my alley. The light blue shade was casual enough for the daytime and the built-in belly band supported the extra weight I’m carrying.

Stitch Fix

Lila Ryan Maternity Liza Distressed Skinny Jean

How many of my pregnant mamas-to-be use Stitch Fix? Comment below and tell me about your favorite pieces…

stitch fix maternity wear

2 comments
0 FacebookTwitterPinterestEmail
Pregnant Belly

PREGNANCY DIARY FROM 26-33 WEEKS

by Rochelle April 5, 2017

They say distance makes the heart grow fonder. Let’s hope that’s the case with my long absence. My pregnancy diary is definitely spread out but hey, that’s what happens when narcolepsy kicks in during the third trimester. Things are definitely becoming more challenging during this stretch so let’s review what’s been happening.

More Body Changes

The most obvious change is my growing belly. It’s still on the rounder side just a lot larger. In addition, that seems to be the only thing growing on me. Sure, my thighs and bust size has increased but not nearly to what I imagined. Since I have no idea what the sex is of our child, I turn to old wives tales. From what I’ve heard, if you are all belly you may be carrying a boy and if you’re having a girl your body widens. Who knows if that’s true but I do find it interesting.

Additional changes include the darkening of my skin. My areolas, linea negra, and underarms have seen the most change but it is very common during pregnancy. My navel has officially popped out but luckily no visible stretch marks have shown up, partly because of my belly care regimen. Want to see how the first 32 weeks went, click here. 

My Belly Care Regimen

My mother had 5 children and proudly wears her stripes. I’m not sure if she had them from baby number one or if it happened later but I’m doing everything in my power to avoid them. I won’t be embarrassed or ashamed if I get them but if they can be avoided, I’m gonna try.

Mustela Maternity

#SecretWeapon With Mustela

Around the second trimester, when my belly size increased, Mustela sent a few products my way to try out. It included the Mustela Stretch Marks Prevention Oil & Cream as well as the Bust Firming Serum. Twice a day, I apply the Stretch Mark Prevention Oil or Cream to my belly, thighs, and butt and I apply the Bust Firming Serum in the morning after my shower. To my surprise, this line has a lightweight texture that absorbs quickly. It also has a fresh, floral scent that’s not overpowering and safe for baby. So far, not a stretch mark in sight and I’m hoping it stays that way. *These products were gifted to me free of charge as part of the Preen.Me VIP program together with Mustela.*

Must Have Clothing Items

As your body changes, so do the size of your clothing. My most important purchases have been soft bras with no underwire or sports bras. Unfortunately, I missed the boat on another necessity for your bras, bra extenders! Had I purchased one, I may have worn the bras for a longer period of time but I skipped them and went straight to a sports bra once I realized I couldn’t breathe anymore.

Another must have splurge were a pair of comfortable wedge slip-on’s. The extra weight has been killing my arches and heels and investing in a pair of flats with a small wedge has made all the difference in my work day.

Diet & Exercise

My appetite has definitely increased! During my second trimester, the baby was so high that anything I ate made me feel full quickly. It was extremely uncomfortable until the baby dropped a little. Then it was game on and I’ve been stuffing my face like a champ ever since. As far as what I’ve been eating, consider everything! I stay away from the usual suspects, raw meats, sushi, unpasteurized dairy, and deli meats but I do crave red meat and anything with peanut butter. I struggle to get my greens so one way I’ve included them is by preparing a smoothie in the morning with a banana, frozen berries and a handful of spinach.

Pregnancy Diary

Don’t Tempt Me, I Will Eat It All!!!

Staying in shape has been another struggle but I manage to get in a 30-minute walk a few times a week. If I really have time on my hands, I visit the gym to do weight training (with much lighter weights) a couple times a week. More recently, I’ve included prenatal yoga which has been a God-send for my achy body.

Hopefully, the next pregnancy diary will happen before the baby decides to arrive. It would be a shame to not update you all with the last few weeks, especially since that’s when all the fun happens (that was a joke). I’d love to hear from all of my pregnant mamas about how your pregnancies are going. Leave me a comment and tell me about your cravings and must have maternity clothing items.

Watch my latest pregnancy vlog here: 

*The Mustela products were gifted to me free of charge as part of the Preen.Me VIP program together with Mustela. All opinions reflect my honest opinion and are based on actual product use* 

2 comments
0 FacebookTwitterPinterestEmail
DevaCurl Buildup Buster Launch

DevaCurl Buildup Buster Launch in NYC

by Rochelle March 14, 2017

Last month, I was invited to NYC with a bunch of other curly influencers for the DevaCurl Buildup Buster launch. It felt like the trip of a lifetime because not only did I get to experience this innovative new product but I met so many of my curl sisters from the online world. Here’s a recap of my two amazing days in NYC.

Day 1: Check in & Workout?

DevaCurl was so amazing for setting this trip up for us all. Many of us flew in from all corners of the country and some internationally. We checked into the hotel and were greeted with a goodie bag filled with a little swag and our itinerary. I was already prepped for the first activity which included a high-intensity dance cardio class at 305 Fitness. With no plans to actually take the class (because I was 6 months pregnant), I still dressed the part and filled my water bottle up to watch and laugh at everyone. But…

Rochelle Masella & Jaime Linn

Meeting My Online Friends IRL

something happened when I got there, I saw Beyonce art plastered on the wall and heard the music blasting. My inner Beyonce wanted to come out to play…just at a lower intensity. I really needed to work out because I had been slacking so I stood in the back of the class and two-stepped my way through. Had I participated like the others, I may have delivered right there on the floor. Luckily, I knew that I had to listen to my body, take frequent breaks, and drink lots of water. We celebrated with a vegan meal at by Chloe and then I was off to bed.

Day 2: Devachan Salon & DevaCurl Buildup Buster Launch Party

Our next day started with a day at the Devachan salon for the ‘Bounce Back” service. After grabbing a quick breakfast, I was greeted by Smadar, my hair stylist and she took me back to the shampoo bowl where I was introduced to Buildup Buster. After a night of breaking a sweat, it made complete sense to me to have this service. Buildup Buster is a micellar water cleansing serum that uses micellar technology to remove buildup from products, hard water and other environmental stressors. She explained how Buildup Buster is similar to a clarifying shampoo but doesn’t strip the hair. Instead it leaves the hair soft with the help of abyssianian oil and jojoba esters. It can be used weekly instead of shampoo and should be followed up with a conditioner like DevaCurl One Condition.

After receiving my treatment, it was off to the chair where she used the DevaCurl Frizz-Free Volumizing Foam and DevaClips to bring volume to my roots. After my curls were dried, she finished off with a little spritz of the DevaCurl Flexible-Hold Hair Spray. My curls had tons of volume and they were party ready!

DevaCurl Buildup Buster

Later that night, we attended the Buildup Buster Launch Party. It was held at the beautiful Root Studios and I was in complete awe of all the curls in one room. There was a photographer, a slo-mo camera, a green screen station and Shake Shack ( I have to admit that got me really excited). I gravitated to the slo-mo camera because I always wanted to star in my own hair commercial (who doesn’t). In addition, a group of us jumped into the green screen station to create our own Buildup Buster commercial. Most importantly, I had the opportunity to meet some of my favorite curly influencers and turned my online friends into real ones.

Big thanks to the team at DevaCurl for this opportunity! It truly was an amazing trip that united my curly sisterhood.

Have you had the chance to try DevaCurl’s Buildup Buster? Let me know how it’s working for you down below in the comments…

Watch the vlog from my trip to NYC:


0 comment
0 FacebookTwitterPinterestEmail
Heatless Blowout

Heatless Blowout | From Curly to Straight

by Rochelle March 7, 2017

Have you ever wanted a blowout without the heat damage? Well, I have a solution that works well on naturally curly hair as well as relaxed hair.  In fact, this is something I used to do frequently when my hair was relaxed to keep a straight style throughout the week. This heatless blowout technique is essentially the same but slightly difficult because of the texture of curly hair.

Heatless Blowout

One of the most important elements of this process is to start on clean hair. Especially if your hair is on the fine, curly side. Use a clarifying shampoo to remove all traces of buildup and dirt on the hair and scalp. Follow up with a moisturizing conditioner and be sure to detangle and rinse well. Blot dry your curls with a t-shirt or paper towels.

How to Wrap Your Hair

Using a wide tooth comb or Wet Brush, detangle the hair one more time. I can’t stress enough the importance of detangling your curls before the wrap technique. It will make the process much smoother. Next, apply a generous amount of Jane Carter Solution Wrap & Roll to your curls and distribute well using a Wet Brush.

Now it’s time to section the hair. The length of your hair can help you determine where your part starts. If your hair is chin length or shorter you can probably start with a deep side part. However, if your hair is longer starting your part behind your ear will be beneficial to keep it flat and smooth.

The key to wrapping is to think of it as one continuous circle. After you’ve created your part, begin brushing the hair flat against the scalp from the front, along the forehead, and behind the ears. To keep the smoothed hair in place, secure with flat duckbill clips and then continue with the wrapping. If you can see or feel bumps, use a rat tail comb to smooth it. When you’re finished, it should resemble a beehive that is laid flat along the scalp. Add flat duckbill clips to ensure that it stays in place.

heatless blowout on curly hair

Overnight/Next Day Care

Next, use a silk or satin scarf to tie down the style and go to bed. It’s very important that you give yourself plenty of time for this to dry otherwise you will end up with random curls and waves. Once your hair is 100% dry, take off the scarf and remove the clips. Using a wide tooth comb, gently unravel the wrap and comb through the hair.

For a visual demonstration, check out my tutorial below. Let me know what your favorite heatless blowout technique’s are below in the comments. 

0 comment
0 FacebookTwitterPinterestEmail
Maternity Clothing

#Slayternity: Nursing Sweater & Slouchy Pants

by Rochelle March 2, 2017

As I enter my third trimester I welcome you to another #Slayternity post! This is the cozy edition that features a nursing sweater and a pair of slouchy pants. Every day as my tummy grows a little bigger I become a little more clumsy which is why being comfortable is at the top of my list. Here’s what I’m wearing to keep up with my appearance.

Old Navy Nursing Sweater

See those zippers! Those aren’t just for decoration. They zip right down so that I can easily nurse when the time comes. In the meantime, this Old Navy Nursing Sweater fits beautifully and provides plenty of extra space near my belly.

Nursing Sweater

Old Navy Nursing Sweater

Forever 21 Tie-Waist Trousers

Let me first acknowledge that these are not maternity pants. However, these Forever 21 Tie-Waist Trousers do have a stretch waistband in the back and can be worn low. The beautiful rust color caught my attention and the tie-front gave the trousers a casual feel. These pants do have a zipper that will eventually not make the cut but will make an appearance again after I deliver.

Forever 21 Tie-Front Trousers

Forever 21 Tie-Front Trousers in Rust

VANS Disco Python SK-8 Hi-Slim

You had me at Disco. How could I not purchase a comfortable sneaker like this? If you read my first Slayternity post then you already know that my black leather Vans were a game changer simply because they were a step up from my knock around sneakers. Although the Vans Disco Python Sk-8 Hi-Slim doesn’t offer a zipper in the back, they offer my swollen feet comfort and they get an A for looking like a shiny, disco ball.

 Vans Disco Python Hi-Slim SK-8

Vans Disco Python Hi-Slim SK-8

What’s your favorite piece of clothing in this post? What are your favorite non-maternity pants to wear in your 3rd Trimester? Let me know down below in the comments. 

1 comment
0 FacebookTwitterPinterestEmail
Pregnancy Diary

Pregnancy Diary From 0 to 25 Weeks

by Rochelle March 1, 2017

For those of you following my pregnancy journey, I felt it was best to document what I could through my blog and video. Since I’m starting late on this, this pregnancy diary post will begin at 0 weeks and go to 25 weeks. It will briefly cover my how I knew I was pregnant, body changes,  and maternity clothing.

How I Knew I Was Pregnant

Shortly after my husband and I started trying, I went to a California Fish Grill to enjoy a bowl of clam chowder and a fish plate. I love fish and was beyond excited to give this restaurant a try. After diving into my first spoonful, I noticed something strange. The clam chowder tasted off. Some people would have stopped there but I tried a couple more bites to make sure I wasn’t crazy. What I was tasting was metallic.

Immediately, I knew that meant one of two things. Either the chowder was truly bad or I was pregnant. I had read somewhere that if fish has a metallic taste it could mean your pregnant. Needless to say, I’ve always kept that in the back of my mind. I glanced at the other tables surrounding me with a bowl of chowder. They licked the bowl clean. Maybe it was just my imagination or the seasoning was off. I stopped eating it just in case but moved onto the fish. No metallic taste there. Probably because it was smothered in lemon, butter, and garlic.

I felt confused but very curious. I called my husband to tell him that my chowder tasted funny and maybe I was pregnant. On my way home I grabbed a pregnancy test and sure enough,  I was.

Pregnancy Diary 1st Trimester (0-12 Weeks)

Grateful is the word that I think about often in regards to my first trimester. No serious nausea, no vomiting. I did experience bloating, however. Almost immediately after I realized I was pregnant, my pants became tight instantly and within a month I was using a rubber band wrapped around my buttons as a relief.

I say “serious nausea” for a reason. I didn’t experience much until my 12th week. All of a sudden, the taste and smell of ground turkey was so gamey and strong and I couldn’t eat it. The same went for red meat. Luckily, that feeling only lasted that one week and then I went back to eating as normal. My only craving was fresh fruit, anything artificial didn’t appeal to me.

Pregnancy Diary

2 Months Pregnant


Pregnancy Diary 2nd Trimester (13-25 Weeks)

Yes, I realize the 2nd trimester lasts until 28 weeks but at the time I filmed my pregnancy vlog that’s where I left off (See link below). During this time, we let both of our families know that we were expecting. Both families were over the moon and filled with questions. Boy or Girl? Who’s your pediatrician? Why aren’t you registered? The truth is, my husband and I had no answers for them except pure joy. We weren’t concerned about the sex, the pediatrician or a baby registry. We only cared about a healthy pregnancy that results in a healthy child.

My tummy was slowly growing and eventually, it was time for maternity clothing. My sister took me shopping and our focus was bigger underwear, bras and maternity pants. My rubber bands were snapping and it was time to invest in the right pants. My underwear was cutting off my circulation and my breasts were spilling out of my bras. Luckily, Target and H&M had maternity sections that were helpful during this process. Check out “Slayternity: Dressing the Bump Without the Frump” to see some of my maternity styles. 

Besides my growing belly, my only other complaints were of round ligament pain. Right above the right and left side of my pelvis were the occasional sharp pain. My doctor told me there was nothing to be worried about as this is part of the process. It is a bit scary at first as I had no idea what to expect. It also only happened on certain weeks.

Want to see how week 26-33 went? Click here for pregnancy vlog #2

Watch My Pregnancy Vlog here: 

Share your pregnancy story with me below in the comments…

1 comment
0 FacebookTwitterPinterestEmail
Easy Headwrap Updo

Easy Headwrap Updo | Alicia Keys Inspired

by Rochelle March 1, 2017

I’ve always loved the natural beauty of Alicia Keys. From her beautiful curls to her makeup free skin. In the last recent months, I’ve enjoyed her hairstyles that include headscarves so I thought I would include a quick tutorial on how to get the look. Here’s one way to do an easy headwrap updo.

What You’ll Need

Elastic Ponytail Holder

Large Colorful Silky Scarf

Easy Headwrap Updo

Begin by gathering all of your curls up near the top of your hairline and securing it with an elastic. This is also known as a pineapple ponytail. It looks great to have the ponytail off center to add a bit of flair. Next, fold your scarf a couple times to make it long and rectangular. Starting at the back of your neck, center the scarf along the nape of your neck. You want to make sure that the size of your scarf covers from your hairline up near the base of your ponytail. Bring the two ends of the scarf to the front of your head and tie a simple knot.

Silk Headwrap

Then, wrap the two scarf ends towards the back so that they overlap and back to the front again. Depending on the length of your scarf, you may have to wrap it a couple times until you’ve come near the ends. Once you’ve reached the ends of the scarf, tie another knot and tuck in the ends.

Adjust and fluff your curls using your fingers or a hair pick. The final look should be asymmetrical.

head wrap on curly hair

What easy headwrap hairstyles have you done? Let me know down below in the comments. Want to see other headwrap styles? Click here. 

Watch The Full Tutorial Here

0 comment
0 FacebookTwitterPinterestEmail
Fringed Poncho

#Slayternity: Fringed Poncho & Flat Boots

by Rochelle January 31, 2017

#Slayternity is back with a new look for the winter season! This week like most focuses on comfort above all. As a fan of oversized sweaters, I’ve included a fringed poncho to the mix. Pairing it with a slim-fit black maternity pant and knee high flat boots gives it a look that is chic and effortless. Here are all the details…

Fringed Poncho

This cable knit sweater poncho has an oversized turtleneck and fringed hem.  The sleeve lays at a 3/4 length and the length of the fringe falls below the knee. The black and white pattern can be mixed and matched with any solid color pant. Available at Forever 21. Find a poncho like this here. 

Fringed Poncho

Turtleneck Sweater Poncho | Forever 21

Over The Knee Flat Boots

It’s not easy finding the perfect pair of flat boots…especially when you’re a size 10. Some make my feet look like skis while others are so wide that I look like I’m swimming in them. What I love about my Marc Fisher Felissa Tall Boots are that the toe is not pointy (because then I look like a clown), the back is stretchy (so it’s form fitting to my skinny calves), there is a zipper closure at the inner ankle, and they’re only a 1 1/4 stacked heel (perfect for long work days on my feet).

Another detail I love is the gold frame at the top of the boot. It easily takes the boot from everyday to evening. As far as the sizing, I did have to order a 9 1/2 as they run big (Hallelujah!)

Tall Over The Knee Boots

Marc Fisher Felissa Tall Boots

How many of you rock a fringed poncho and what are your favorite brands? Also, do you have big feet and skinny calves? What are your favorite shoe styles and brands for this? Let me know down below in the comments…

0 comment
0 FacebookTwitterPinterestEmail
Newer Posts
Older Posts

Newsletter

Keep in touch

Instagram Pinterest Youtube
discocurldesigns - Etsy
Shop Curly Hair Merchandise by discocurldesigns located in LA, California.
  • Facebook
  • Twitter
  • Instagram
  • Pinterest
  • Youtube
  • Contact
  • Privacy Policy

© 2016-2023 DiscoCurls.com. All Rights Reserved.


Back To Top
DiscoCurls
  • Home
  • Curls
  • Beauty
    • Makeup
    • Skincare
    • Nails
  • Style
  • Lifestyle
    • Pregnancy
  • Videos
  • Contact
  • Resources
    • FREE Curly Hair Product Tracker
  • YouTube
  • Shop
    • Amazon
    • Etsy
    • Teespring Store
    • ObsessedWith.It
  • Links

Shopping Cart

Close

No products in the cart.

Close