• Home
  • Curls
  • Beauty
    • Makeup
    • Skincare
    • Nails
  • Style
  • Lifestyle
    • Pregnancy
  • Videos
  • Contact
  • Resources
    • FREE Curly Hair Product Tracker
  • YouTube
  • Shop
    • Amazon
    • Etsy
    • Teespring Store
    • ObsessedWith.It
  • Links
  • 0
DiscoCurls
Curls. Beauty. Lifestyle.
Category:

YouTube Videos

image of Noughty Hair Care Products

Noughty Hair Care Review on Fine, Curly Hair

by Rochelle October 27, 2021

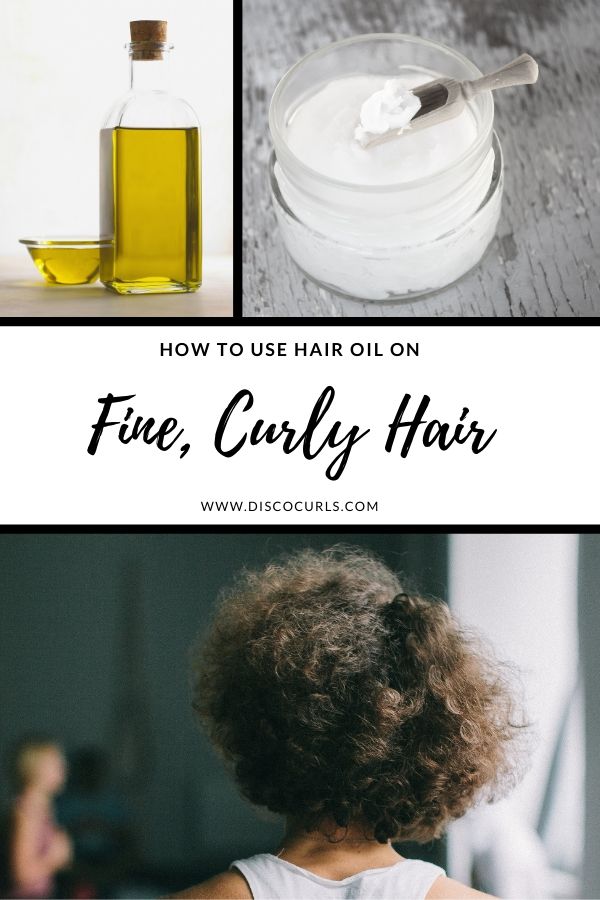
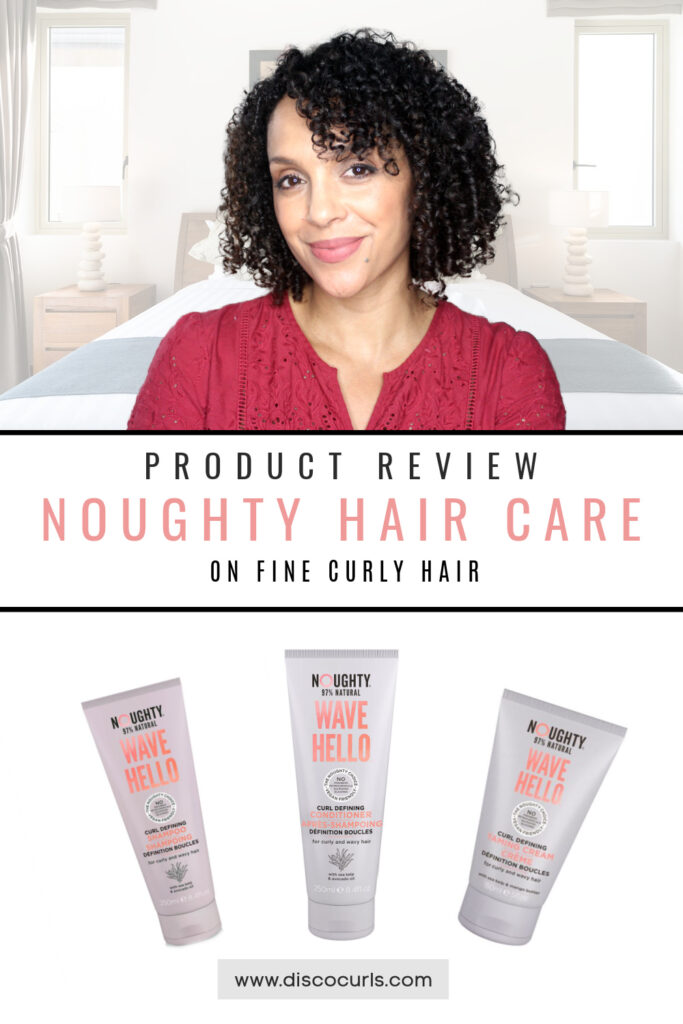
Finding an affordable curly hair line can be challenging when we’re focusing on ingredients. Luckily, I discovered the brand Noughty Hair Care that has proven to be a great addition to my curl collection. So, today I thought I’d share my thoughts by doing a Noughty Hair Care review on my fine, curly hair.

Noughty Hair Care Review & Details

The Noughty Hair Care brand is 97% natural , cruelty free, and vegan friendly. Plus, their products do not contain parabens, petrochemicals, sulfates, or silicones. For this review and demo, I tried a selection of different lines from the brand that I thought would work well in my fine, curly hair.

After an Ulta Beauty haul, I purchased everything I needed for a wash n go. This included the Noughty:

  • Wave Hello Curl Defining Shampoo & Conditioner
  • Rescue Intense Moisture Treatment
  • Intensive Care Leave-In Conditioner
  • Wave Hello Curl Taming Cream
  • Hey Curl Scrunching Jelly

My ultimate goal was to find an affordable line that was made with cleaner ingredients. At $12.99 and under, it was easier to do a haul on a budget.

Cleansing and Conditioning with Noughty

Noughty Wave Hello Curl Defining Shampoo. This gentle shampoo cleanses the hair without drying it out, leaving the curls to feel soft and defined. It’s made with sea kelp extract, avocado oil, and chlorella extract that helps provide the hair with vitamins and amino acids to keep moisture in and smooth hair. Further, the scent and formula smells fresh to me. It states online that is has an invigorating ocean fresh scent if that helps you understand better. 

women on a MacBook
Track Curly Hair Products With This FREE Printable!
Introducing the Curly Hair Product Tracker, a printable to document how each and every one of your products works on your curls.

Noughty Wave Hello Conditioner. This moisturizing conditioner contains avocado oil, sea fennel, and Irish moss. After use, I definitely felt that the lost moisture in my hair had been replenished and much stronger. Just like the shampoo, it has a lovely, light, ocean scent.

Noughty Rescue Intense Moisture Treatment. Although this mask is meant to help very dry and overly processed hair, my fairly-healthy curls enjoyed this. My hair is in pretty good condition but after adding highlights I did notice that I could use a really good treatment. What I love about this is that I can use it for less than 5 minutes and see wonderful results that help soften and really moisturize my hair. 

The benefits state that it will help to improve the structure of the hair’s surface, make it easy to comb and add shine. In addition, it contains lecithin, meadow foam oil, and argan oil to smooth, lock-in moisture, and help with elasticity. The fragrance has a warm almond scent.

noughty hair care review

Styling with Noughty

Noughty Intensive Care Leave In Conditioner. As I mentioned before, the Intensive Care line from Noughty is designed for damaged hair. This really made sense for me to use prior to cutting my hair short. To clarify, I waited 3 YEARS for a trim (insert face palm emoji). It’s a little on the heavier side so it may not be recommend to everyone with fine curls but possibly with smaller amounts.  

This leave-in contains vitamin E, argan oil, shea butter, and has a lovely argan and almond scent. If you find this to be too heavy on your curls, I’d opt for the Noughty Thirst Aid Conditioning & Detangling Spray.

Noughty Curl Taming Cream. This curl cream has a smooth and creamy texture that leaves curls feeling hydrated. It truly helped tame my frizz and keep the curl definition locked in place. It’s definitely been one of my favorite items from them so far.

As far as the key ingredients and benefits it contains QuinOxy (Noughty’s unique curl optimizing formula), a blend of wheat extract, camelia oil, and linoleic acids, and mango butter. I found this formula helped to soften, smooth flyaways, and moisturize my hair.

Noughty Hey Curl Scrunching Jelly. I’m a big fan of gels which is why this lightweight gel was one of my favorites. Although this option felt thick as it came out, it added major shine and definition without the hard crunch. It uses vitamin-rich sea botanicals blended with copolymers to give long lasting definition along with a blend of plant oils to help strengthen and reduce damage.

My Top Picks from Noughty Hair Care

Out of all of the Noughty Hair Care products I used, my top 3 are the Noughty Rescue Intense Moisture Treatment, the Noughty Wave Hello Curl Taming Cream, and the Noughty Hey Curl Scrunching Jelly. I can definitely see myself purchasing these again and adding them to my curl collection.

Hopefully this Noughty Hair Care review gave you a thorough understanding of how their products work on my fine, curly hair. Please let me know if you have tried this as well on your curls and what your favorite products are from them.

0 comment
2 FacebookTwitterPinterestEmail
scattered roses

5 Rose Scented Products That Uplift My Beauty Routine

by Rochelle February 10, 2021

As we inch closer to Valentine’s Day, I thought I’d discuss my love for beauty products that smell like roses. This beautiful flower hasn’t always been my favorite but my body chemistry seems to work well with it now. Here’s a small list of 5 rose scented products that uplift my beauty routine.

TGIN Curls & Roses Collection

Many of my hair products smell like fruit or vanilla so I was thrilled to try out some of TGIN’s Rosewater products. This collection uses rosewater and hibiscus as their key ingredients.

Some of the products from this line contain silicones but I managed to create a wash day routine with a few of their silicone-free items. My personal favorites and the one I used in the video include:

  • TGIN Rosewater Sulfate Free Hydrating Shampoo: A gentle sulfate-free shampoo that promotes hair growth, moisturizes, and protects the hair.
  • TGIN Rosewater Smoothing Leave-In Conditioner: A moisturizing leave-in that helps seal and protect the hair
  • TGIN Curl Defining Styling Gel: A soft hold gel that helps define, reduce frizz, boost volume, and doesn’t flake.

Schmidt’s Rose & Black Pepper Deodorant

Schmidt’s Rose & Black Pepper natural deodorant is my favorite item from this list. This hemp seed oil enriched deodorant has a beautiful floral rose fragrance mixed with a touch of black peppercorn. Most importantly, this formula is perfect for sensitive skin if you have allergies to baking soda.

Heritage Store Rosewater Spray

This cult-favorite face spray continues to be a staple in bathrooms and for good reason. It helps tone, soothe, and calm the skin. Similarly, it makes an amazing makeup setting spray.

This natural product only uses two ingredients, Hydroessential Rose Oil and Vor-Mag water and is free of dyes, alcohol, parabens, sulfates, and phthalates. It is definitely one of my must-have self-care products.

Now Essential Oils Rose Absolute Oil

After watching “The Crown” on Netflix, I learned that queens are anointed with oils. That’s why I’m doing the same for myself. Now Essential Oils Rose Absolute oil contains a 5% rose oil and jojoba mixture that leaves a gentle yet fragrant hint of rose wherever you place it.

rose scented beauty products

I love adding touches of it on my neck, décolleté, my waist, and between my eyes for third-eye activation. Above all, mixing it with my body lotion or smoothing it in my hair also makes me feel irresistible.

Dr. Bronner’s 18-In-1 Hemp Pure-Castile Soap Organic Rose

Last on the list is the Dr. Bronner’s 18-In-1 Hemp Pure-Castile Soap Organic Rose. This helps makes any shower more luxurious. Further, it helps the floral essence last on your body throughout the day.

Dr. Bronner’s has been in the soap making business for over 150 years and his ‘magic soap’ can be used 18 different ways. Some of my favorite ways to use it is as:

  • A body wash
  • A clarifying shampoo (on occasion)
  • A face wash (just be careful of your eyes)
  • A laundry detergent for my delicates

Incorporating rose scented beauty products has been an easy way for me to uplift my spirits and bring a romantic vibe into my daily routine. What are some of your favorite rose scented must haves? Share with the community down in the comments.

1 comment
2 FacebookTwitterPinterestEmail
scalp scrubs

3 Scalp Scrubs to Exfoliate Buildup

by Rochelle March 19, 2020

Although they are not new products, scalp scrubs have been increasingly popular to remove buildup, dirt, and clarify the scalp. They are something that I’ve found incredibly helpful since I do nightly scalp massages with oil. So I thought I’d share 3 scalp scrubs that I put on rotation to exfoliate buildup.

Why Scalp Scrubs are Helpful

Like a facial and body scrub, scalp scrubs help remove product buildup, impurities and dead skin cells to reveal clean roots. Scrubs help clarify the scalp and hair which in turn can bring more volume. Using them depend on their specific directions plus other factors like hair color.

To my knowledge, if you have a scalp condition, eczema, psoriasis, irritations, sores or cuts on your scalp you should NOT be using a scalp scrub as it may cause further irritation.

3 Scalp Scrubs That I Love

Scalp scrubs can be physical or chemical but I seem to prefer physical exfoliants better. Here are my current favorites.

Not Your Mother’s Activated Bamboo Charcoal & Purple Moonstone Restore & Reclaim Scalp Scrub

This pre-wash scalp scrub is gentle and uses natural jojoba wax beads to exfoliate. Made with 98% natural ingredients, it doesn’t contain sulfate surfactants, silicones, parabens, dyes, gluten, or phthalates.

Subscribe for your FREE Curly Hair Product Tracker

* indicates required

I like to use this at least one or two days per month on the days I clarify. Because it is considered a pre-wash, I apply a generous amount onto my wet hair before I shampoo. Then, I use the pads of my fingers to gently massage. What I love about this scrub is that it doesn’t feel harsh when I apply it.

After rinsing it out well my scalp feels smooth and refreshed. I can continue with my shampoo and conditioner routine without feeling stripped.

Briogeo Scalp Revival Charcoal + Coconut Oil Micro-Exfoliating Shampoo

If you suffer from a dry, irritated scalp, dandruff or just need something to remove heavy buildup, this micro-exfoliating shampoo is your product. Because the shampoo already includes a vegetable derived exfoliant, after rinsing you can go straight to conditioner.

Although it’s on the pricier side, this has been one of my personal favorites. I’ve always been obsessed with the tingling in my shampoo and this has peppermint and spearmint that cools my scalp. Plus, it contains Binchotan charcoal to remove impurities and coconut that moisturizes. After rinsing it out, my hair feels more hydrated than expected.

Eva-NYC Deeptox Exfoliating Salt Shampoo

This new kid on the block is another unique scrub shampoo combo that exfoliates and cleanses the scalp in one easy step. Similar to most other Eva NYC products, it contains Argan Oil to hydrate and nourish, as well as the brand’s own Keravis Protein Complex to strengthen strands at the root. Best of all, it doubles as a body scrub to smooth rough patches on the body.

In addition, it includes sea salt, pomegranate extract, and witch hazel.

·         Sea Salt – Physically scrubs away dead skin cells and product buildup. Also increases blood circulation, promoting a healthy scalp

·         Pomegranate Extract – Known for its potency of antioxidants, this ingredient keeps you beautiful inside and out. In this formula, the extract provides purifying and anti-inflammatory benefits

·         Witch Hazel – A commonly known natural astringent, it clarifies the scalp and normalizes oil production

Sea salt is not something I normally use on my scalp and hair because it can be a bit drying. However, the mixture of argan oil helps it feel slippery while applying. This creates a nice sudsy consistency and a little goes a long way.

Out of the three scalp scrubs mentioned, this felt to be the most clarifying. With that being said I may only use this about once a month on my scalp and I do recommend following up with a deep conditioner after use.

Have you ever tried a scalp scrub on your curls? What were your results? Share with the community down below in the comments.

2 comments
0 FacebookTwitterPinterestEmail
curly hairstyles

Easy Curly Hairstyles for Busy Moms

by Rochelle March 11, 2020

Do you find that you have very little time to style your curly hair as a mother? Well, after having a 2.5 year and 14 month old I have learned that time is truly of the essence. Luckily, I’ve come up with 3 easy curly hairstyles that any mom can do in just a few minutes.

I really wanted to share a few styles that you can complete in minutes because I remember how hard it was to be pregnant while chasing a toddler. I had no time to spend on my hair (and still don’t) but wanted to make somewhat of an effort. Here are a few easy styles to try.

3 Easy Curly Hairstyles

Half Up Half Down With Mini Clips

Using mini clips brings me back to the 90’s and early 2000’s. It was such a huge part of hairstyles to include them and use different colors.

For this style, start by gathering a small horseshoe sized section up front for the half up part of your style. No need to make the section perfect as it is meant to be unpolished. Within that section of hair, create three mini sections and use mini butterfly clips at the base to hold and create lift.

Curly Hairstyle

Curly Low Twisted Bun

Using the same horseshoe sized section, I pull back my bangs to create a pouf and then secure it with bobby pins. Then grab two large sections from each side of your head but in front of your ears. Gather the two sections towards the back of your head into a loose ponytail and secure it with a tiny elastic.

With that same ponytail, create a hole above the elastic and flip the tail into the hole. Pull the tail through. Then, repeat this step until the tail is hidden to create a bun. Add pins as needed.

You will continue making two more ponytails and repeating the process. The bottom ponytail can be left out or put into a bun. Add embellished pins , a head wrap, or combs to dress it up.

Curly Updo

Braided Curly Half Updo

For the last style, use the same horseshoe section and create a braid that falls to one side. Create another single braid at the front that’s falls to the other side off center. Pin the two braids together at the center of your crown. Add decorative gold or silver cuffs to the braid.

Braided Curly Half Up Hairstyle

Want a video tutorial on these easy curly hairstyles? Watch my YouTube video below.

1 comment
0 FacebookTwitterPinterestEmail
transitioning curls

10 Tips for Transitioning Curls

by Rochelle February 28, 2020

The transition from straight to naturally curly is not the easiest process. It’s a journey, right? If you’re not going to do the big chop, then you have a whole other set of obstacles to face. So, I’m going to share my favorite 10 tips for transitioning curls.

While I was transitioning, YouTube wasn’t as popular as it is now and the amount of influencers that I could relate to varied. I relied heavily on my hairdressers and friends with curly hair to figure it out. So I want to share a few general rules along with my personal tips for a successful transition.

#1 Stay Away from the Heat!

No blowouts or hot tools. Heat damage is probably the worst thing you can do while transitioning. It’s also the hardest part of the entire process, especially if that is what you’re used to doing daily. Trust me, you’re going to get frustrated as you watch some areas grow in curly while the ends are straight. However, there are solutions for that (See #7 below). Also, occasionally straightening your hair with hot tools can possibly start you back at square one.

#2 Stay on top of your trims.

You don’t have to big chop but what I noticed is that everytime I trimmed, my curls got a little tighter and bouncier. That’s because I was slowly removing the dead ends. Think of it as dead weight just holding your curls back from their full potential.

#3 Consider a Protective Style

This tip is not totally necessary but it was what I personally did while I transitioned. My hair was damaged so badly with bleach and relaxer and it started breaking off. I put in a partial sew-in weave because I was feeling so embarrassed .

The majority of my hair was in a protective corn-row with my hairline and a horseshoe section left out. That was done so I could hide the weft and occasionally put my hair up into a ponytail. There were pros and cons to this but it helped the hair growth transition move faster while hiding the damage. Find out my pros and cons of wearing a sew-in weave for long periods of time.

Subscribe Here for my FREE Curly Hair Product Tracker

* indicates required

#4 Limit Your Use of Silicones

Silicones offer a temporary solution for frizz, they help with slip in our conditioners, and add shine but it’s short lived. In the long term, they can weigh down your curls and cause buildup. They are harder to remove so you really need to clarify to get them out of your hair. The more often you use silicones, the more often you will have to clarify. A consistent cycle can lead to further dryness.

In my opinion, silicones are not that evil. In fact, there are a few instances when I think they’re ok. For example, if you swim in chlorinated water, silicones can help create a barrier between your hair and the chlorinated water. They also provide protection from heating treatments (if you still use them while transitioning). However, certain oils, conditioners, and using a swim cap can offer the same protection without the use of silicones.

image of rochelle masella with damaged curls vs healthy curls

#5 Don’t Forget to Clarify!

It might sound like I’m contradicting myself after reading #4 but it’s still important to clarify. Excess buildup, debris, and possible fungus can happen and cause a number of problems if it’s not addressed.

My weekly wash and go’s go something like this. Wash the hair twice per week. Co-wash one day and clarify the other. Because I hardly use silicones, I can safely use gentle clarifying shampoos like Kinky Curly Come Clean Shampoo to clarify.

However, if you do use products that contain non-soluble silicones you will more than likely need a sulfate shampoo to get rid of the buildup. Just be sure to follow up with a deep conditioner afterwards.

#6 Weekly Deep Conditioners

Repairing your hair with deep conditioners while it is transitioning is a definite yes because you want to prevent further damage. I found it common to experience breakage and thinning at the line between new growth and the relaxed/heat damaged hair.

#7 Train Transitioning Curls with these Tips

Finger coils are amazing for transitioning curls. They keep the curls uniform and just train problem areas. You can also use perm rods or flexi-rods on straight ends to help match you natural curl pattern.

#8 Search for your Curl Twin and Not Your Curl Crush

There’s a big difference between relating and wanting. Don’t expect to get the same results as your curl crush if you don’t share the same hair texture, porosity, and density. You may not get the results they get. They might offer great general advice but listening to your curl twin will give you a more realistic expectation.

#9 Rotate Your Products

If you’ve been using the same product for a while and your curls don’t look like they first did, try something new. You’d be surprised how a simple switch can revive your transitioning curls.

#10 Embrace the Journey.

It’s not going to be easy. You will learn a lot but the transition itself does feel like a transformation from within. I felt so happy when I reached the end of my journey. Through experience and a lot of trial and error, I feel a bit like a curl expert ready to exchange my expertise to someone in need of curl advice.

I’d love to hear from all of you about your favorite transitioning tips down below in the comments. Want to hear more transition tips for curls? Watch the video below.

0 comment
1 FacebookTwitterPinterestEmail
Winter Wash and Go Routine

Winter Wash And Go for Fine, Curly Hair

by Rochelle February 6, 2020

If you are looking for the perfect winter wash and go routine for fine curly hair, then look no more! This detailed hair routine not only moisturizes but adds volume. Follow these step by step directions on exactly how I wash my fine curly hair during the colder months.

This method can be done at anytime of year but because the hair typically drier (and takes longer to dry when it’s cold), this may be more helpful. In a nutshell, it’s my normal hair care routine enhanced with additional techniques and devices.

My Winter Wash and Go Routine

Before hopping in the shower, I like to do a pre-poo with a deep conditioner. The reason is because it helps soften and make the detangling process a bit easier. Plus, I spend less time in the shower.

Because I’m not following the traditional rules of applying my deep conditioner after washing my hair, I like to get my hair damp with a spray bottle. This ensures that I’m adding moisture first.

After my hair is damp, I create a mixture of my deep conditioner with sweet almond oil. Then, I apply this to my hair in sections. The next step is crucial for adding maximum moisture, using my Q-Redew. By using this handheld hair steamer, I’m able to blast the hair with moisture and make conditioner penetrate deeper. I use the prongs to steam and detangle then clip those sections back.

Once all sections are complete, I put on a disposable cap and leave it on for 20-30 minutes. Then, I wash and condition my hair as normal. The only real difference in the styling portion of my routine is including plopping.

winter wash and go on fine curly hair

How to Avoid a Wet Head Outside

Plopping is a way to absorb excess water and product from the hair to help the hair dry quicker. Plus, it can create lots of volume to your curls.

After I apply my styling products, I use a large t-shirt to plop. You can do this overnight or after your normal wash routine. During the winter, it’s helpful to use a diffuser on a low speed and heat setting to avoid having wet hair outside.

What are your thoughts on my results? Will you try this method and also share your winter curly hair tips below in the comments.

0 comment
0 FacebookTwitterPinterestEmail
photo of yellow banana

Baby Food Hair Mask for Dry, Curly Hair

by Rochelle February 5, 2020

There are tons of DIY Hair Mask recipes out there in the world but did you know that using baby food can simplify the process? Well, find out why making a baby food hair mask is beneficial and try this recipe for your next DIY.

Some of you might wonder, why I would use baby food in my hair? Here are three reasons why.

  1. Baby food helps cut the prep time in half by already being pureed and super smooth.
  2. You don’t have to worry about hard-to-rinse-out food particles or large chunks in the hair.
  3. It’s affordable. You can get a jar of baby food for about a dollar and up.

Banana Baby Food Hair Mask

One of my favorite easy hair masks uses banana baby food. Banana is literally one of the hardest fruits to get out of your hair so I really appreciate using jarred or pouch style for any type of hair mask that requires a banana. I recommend using organic blends for these types of hair masks to avoid the added preservatives.

This is such an easy recipe because it only includes 3 ingredients.

  • 1 Jar or Pouch of Banana Baby Food
  • 2 tablespoons of olive oil
  • 1 tablespoon of honey

Bananas are super hydrating, contain potassium, and are helpful with dry scalp. Olive oil nourishes the scalp, conditions the hair, and improves elasticity. Lastly, honey is an excellent humectant that treats dandruff, conditions, moisturizes and makes the hair shiny.

image of curly hair after using a hair mask

I like to have a few other tools handy when I’m doing DIY masks to avoid a mess. First, I make sure to cover my shoulders with a towel. Also, I like to use a hair coloring brush for the application and a disposable shower cap that I can throw away after I’m done.

How to Make & Apply Mask

The first thing I do is combine all of the ingredients. I get a small bowl and add my jarred banana baby food, olive oil and honey. You can use a fork or a whisk to blend it together and then your mask is ready to go.

If your hair and scalp are dirty and due for a wash then cleanse first then proceed to the next step. If not, then rinse and detangle the hair well.  Next, part the hair into 4 sections and start applying the hair mask from the back working up to the front. I like to make sure that all of my strands are saturated well. Then I clip my hair back and put on my plastic cap. Leave it sitting for 20-30 minutes.

After 20-30 minutes rinse it out. Even though you are using pureed baby food, it is extremely important to rinse well. An additional option is to do an additional co-wash with conditioner to help remove any remaining bits of food.

In general, treat this DIY like you would any other deep conditioner and do it once a week for long-lasting results. Every time I do this, my hair feels soft and restored. If you enjoyed learning about this, feel free to leave a comment and also share your favorite DIY hair masks below!

0 comment
0 FacebookTwitterPinterestEmail
curly hair woman

DIY Pumpkin Hair Mask for Dry, Winter Hair

by Rochelle November 29, 2019

Obsessed with pumpkin spice during the holidays? If you’re like me it enters your life during the fall season and puts you right into the spirit. Not only does pumpkin smell and taste heavenly but it can work wonders as a hair mask. So I’m going to share an easy DIY pumpkin hair mask that will soften and moisturize your dry winter hair.

What does Pumpkin do for the Hair?

If you are wondering why pumpkin works in a hair mask, let’s break it down. First, it’s filled with nutrients that are beneficial to the hair. Vitamin A helps the skin (scalp) produce healthy oils. Potassium, also found in bananas, help strengthen the hair, and vitamin E to stimulate the scalp and promote hair growth.

In addition, if you are working with pumpkin seed oil you are soaking up tons of essential fatty acids that help the hair retain moisture and help with dry skin.

Ultimately, pumpkin is the perfect ingredient for this DIY hair mask to combat dryness and smell like the holidays!

How to make the Pumpkin Hair Mask

For this mask, you have the option to use cooked, pureed pumpkin or canned pumpkin. I happened to have a leftover can of pumpkin so for the sake of this tutorial, I chose the easy route.

  • 1 cup of canned pumpkin
  • 2 tablespoons of virgin coconut oil
  • 2 tablespoons of honey

Combine all of the ingredients. The canned pumpkin, coconut oil, and honey into a mixing bowl and mix well with a fork.

Once the mixture is ready, start by applying this to wet, sectioned hair. You can wash with a shampoo first or just wet and rinse it. Some people may want to shampoo after but I prefer to rinse this out and do a co-wash. That way my hair doesn’t feel stripped afterwards.

Once it’s saturated, I add a disposable shower cap to lock in the heat. Then, I leave the hair mask on for about 15-20 minutes.

After the times up, rinse out the hair mask really well then co-wash with a conditioner. After rinsing out my conditioner, I follow up with my stylers and let my hair air dry.

My hair always feels soft, hydrated, strong and shiny after doing the DIY pumpkin spice hair mask. What’s your favorite DIY hair mask or treatment? Share with the community down below in the comments.

1 comment
0 FacebookTwitterPinterestEmail
Belle Bar Organic Tea Rinse

Belle Bar Organic Tea Rinse

by Rochelle November 3, 2019

Lately, my dry and itchy scalp have created the need for something new in my hair care rotation. That’s why I was excited to try the Belle Bar Organic Tea Rinse. I was introduced last year to their brand because they customize ingredients to work specifically with your hair concern.

In addition, their pre-packaged DIY kits don’t require you to search for hard-to-find ingredients. Sounds like a win-win for anyone that likes the convenience. Check out these details on Belle Bar Organic and how it worked on my fine, curly hair.

What is Belle Bar Organic?

Their website states, “Belle Bar’s entire mission is to make women of color believe in the importance of living a life free of toxins, harmful chemicals, and inorganic ingredients, especially in our beauty products.”

Their organic, customizable hair and skincare brand uses high-quality ingredients that takes the guesswork out of what’s in your products. This brand uses natural ingredients that aren’t normally lying around in your kitchen but seen in many popular hair products.

Unfortunately, the Scalp Balancing Custom Tea Rinse (my favorite) no longer appears to be on their website but they do carry another tea rinse that looks promising.

That particular tea rinse was designed for irritated scalps, dandruff, thin and shedding hair. It contained hops flowers for it’s anti-inflammatory properties, rosemary leaf to promote thicker, stronger hair, lemongrass to strengthen hair follicles and witch hazel to soothe the scalp.

How to do a Tea Rinse with Belle Bar Organic

One way to do a tea rinse is to begin brewing one teaspoon of the tea mixture in the provided tea bag (similar to brewing a cup of tea). Wait to let the tea mixture cool then pour it into a spray bottle. The mixture can be used on the scalp and curls and stays fresh for a week in the refridgerator.

Another great option is to spray the mixture to relieve a tight and itchy scalp from braids or twists.

Additionally, the strained tea rinse can be poured onto your hair after your shampoo and before a deep conditioner. The Belle Bar Organic Waikiki Restorative Hibiscus Hair Mask is a perfect addition to help hydrate dry, damaged, broken hair. See how I did it here.

Overall their tea rinse made my scalp feel clean, less itchy and was an incredible prep for my styling products. If you have tried this tea rinse, be sure to share your experience down below in the comments.

DIY Tea Rinse for Healthy Hair & Scalp

1 comment
0 FacebookTwitterPinterestEmail
Hair Oils for Fine Curly Hair

How to Use Hair Oil on Fine, Curly Hair

by Rochelle October 20, 2019

How many of you with fine, low-density curls have noticed that using oils makes your hair greasy and weighed down? Well don’t feel lonely, my experience has been the same. There is a time and a place for each oil and I’ve broken down how to use hair oil on fine, curly hair.

Pre-Poo’s

Pre-poo’s are treatments that are applied to the hair prior to using a shampoo or conditioner. Oils, masks, and other treatments are perfectly fine for this technique. Although coconut oil is heavy and greasy on finer textures, it’s a great pre-poo for detangling. It has so much slip and makes tangles melt away.

To use apply a generous amount of coconut oil to your hair then finger detangle gently. Follow up with a clarifying shampoo to remove the excess oil, then apply a hydrating conditioner.

Now Solutions Jojoba Oil

Intensify Deep Conditioners

When adding oils to deep conditioners, there are plenty of oil options. However, be careful of the ratio of oil to deep conditioner. If the deep conditioner is the last step too much oil will leave your strands weighed down.

Great oils to try are argan, brassica, sweet almond, and jojoba oil. They are on the lighter side and are better options for fine, curly hair. Another tip is to focus the deep conditioner/oil mix on the mid-shaft area to the ends so that volume isn’t sacrificed.

Hot Oil Treatments

Hot oil treatments can be used for a variety of reasons. They can help with dandruff, frizz, and a loss of moisture. They’re available in pre-made packaging or you can make it easily at home.

When using them on finer textures, my favorite trick is to apply them on the mid-shaft area of the hair working down to the ends. In addition, applying them prior to shampooing can avoid the heavy weighed down look. Some of my favorite oils to DIY with are grapeseed, argan, apricot, almond or lightweight blended oils.

Innersense Harmonic Healing Oil

Hair Oil for Dry Ends

Whether your ends are damaged, color-treated, or splitting, using hair oil can help heal them. Lightweight blends like Innersence’s Harmonic Healing Oil absorb quickly without feeling greasy and have an intoxicating herbal fragrance. Best of all, it’s multi-purpose and you can use it on your skin and nails.

Scalp Massages

Scalp massages stimulate blood circulation and promote healthy hair growth. When focused on growth, an oil like the Tropic Isle Living Red Pimento Oil is my go-to. It’s on the heavier side due to the castor oil but just a few drops for the scalp massage have offered amazing results!

For all other scalp massages, it’s easy to make blends using a carrier oil and specific essential oils. Jojoba or argan oil are great lightweight options that you can blend with a few drops each of peppermint, tea tree, and/or rosemary essential oil.

To create a batch to leave by your nightstand, purchase a glass dropper bottle and fill it with the carrier oil and several drops of the essential oils listed above. Before bed, add a few drops to your hands and fingers and massage for 5 minutes.

What are some of your favorite hair oils for fine, curly hair? Share your favorite oils and the way you use them down below.

1 comment
0 FacebookTwitterPinterestEmail
Newer Posts
Older Posts

Newsletter

Keep in touch

Instagram Pinterest Youtube
discocurldesigns - Etsy
Shop Curly Hair Merchandise by discocurldesigns located in LA, California.
  • Facebook
  • Twitter
  • Instagram
  • Pinterest
  • Youtube
  • Contact
  • Privacy Policy

© 2016-2023 DiscoCurls.com. All Rights Reserved.


Back To Top
DiscoCurls
  • Home
  • Curls
  • Beauty
    • Makeup
    • Skincare
    • Nails
  • Style
  • Lifestyle
    • Pregnancy
  • Videos
  • Contact
  • Resources
    • FREE Curly Hair Product Tracker
  • YouTube
  • Shop
    • Amazon
    • Etsy
    • Teespring Store
    • ObsessedWith.It
  • Links

Shopping Cart

Close

No products in the cart.

Close