• Home
  • Curls
  • Beauty
    • Makeup
    • Skincare
    • Nails
  • Style
  • Lifestyle
    • Pregnancy
  • Videos
  • Contact
  • Resources
    • FREE Curly Hair Product Tracker
  • YouTube
  • Shop
    • Amazon
    • Etsy
    • Teespring Store
    • ObsessedWith.It
  • Links
  • 0
DiscoCurls
Curls. Beauty. Lifestyle.
Category:

YouTube Videos

Hot Oil Treatment

Hot Oil Treatment on Fine, Curly Hair

by Rochelle October 11, 2019

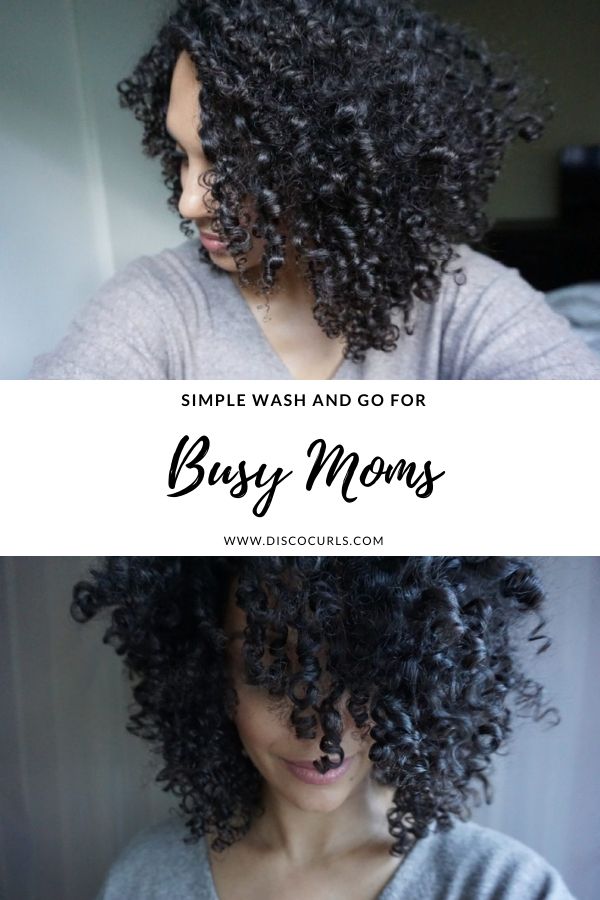
If you have fine, curly hair, you may avoid doing a hot oil treatment. They can weigh down your curls and not in the good way. However, my fail-proof method helps hydrate, seal, add shine and reduce frizz on my own curls. Here’s how I do it.

My Secret Method for Hot Oil Treatments

Doing a pre-poo hot oil treatment has been the best solution for my curls. By doing this, you are able to rinse more of the oils during your shampoo. It also results in less of a chance of flat, lifeless hair when it’s dry.

Best Oils for Fine Curls During Hot Oil Treatments

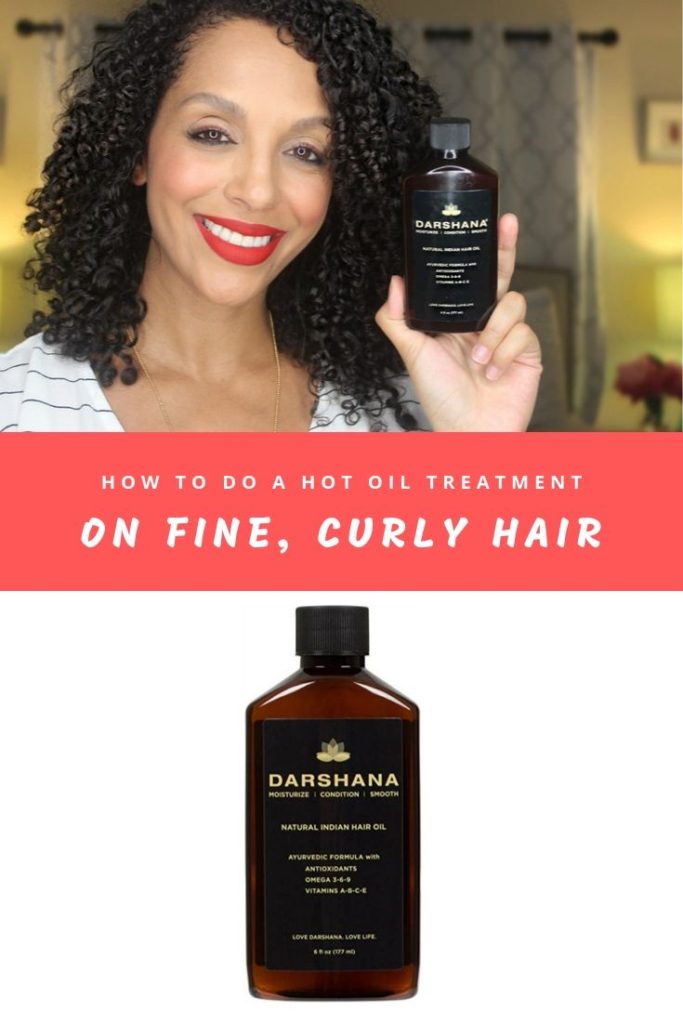
With fine, low-density curls, there are certain oils that work better than others. My favorites are grapeseed oil, jojoba, argan oil, almond oil, and apricot oil. They don’t leave my hair feeling coated like many of the heavier oils out there. There are also lightweight, pre-made oil blends like the Darshana Natural Indian Hair Oil which.

Darshana Natural Indian Hair Oil for Hot Oil Treatment

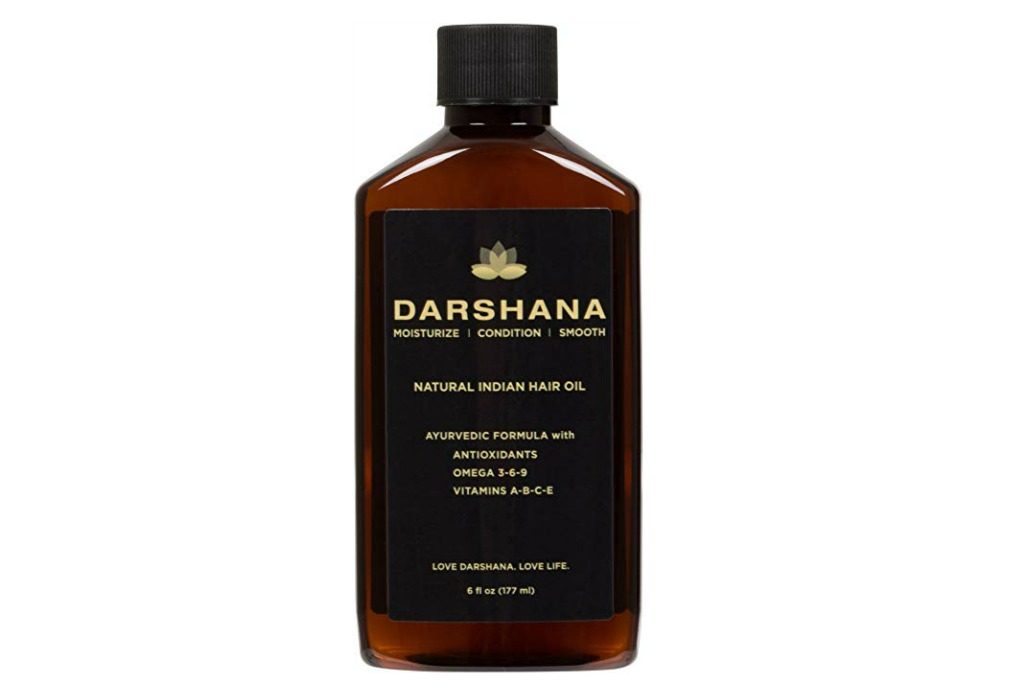
The Darshana Natural Indian Hair Oil is a blend of sunflower, coconut, orange peel, olive, apricot, castor, and grapefruit. It also contains a ton of extracts. This ayurvedic formula smells delicious with the orange peel as the first fragrance note noticeable. .

How to do a Hot Oil Treatment on Fine, Curly Hair

  1. Start by pouring a small amount of the oil into a glass mason jar. Place it into a pot of boiling water for just a minute or two.
  2. Because this is a pre-poo, apply this prior to showering and shampooing the hair. I like to start on wet or damp hair so I give it a quick rinse under the sink.
  3. Next, apply the heated oil strategically below the mid-shaft area and ends. You don’t need to apply a lot for this to be effective. If you want to apply this to the scalp, use a small amount (half a teaspoon). Give yourself a quick scalp massage.
  4. Another option is to apply a deep conditioner in the area from your roots to the mid shaft. This will ensure that all of your hair some love.
  5. Next, put on a disposable shower cap or wrap a plastic bag around your head. Give yourself 30 minutes so that everything penetrates and then return to your shower and continue with your wash routine. I personally shampoo just my scalp area, rinse well,  follow up with a conditioner, then rinse it all out.

Post-Treatment Styling Suggestions

I like to stick to lightweight stylers on the days I do a hot oil treatment. I prefer spray style leave-in conditioners, foams or gels best to avoid my hair from getting weighed down.

My results from a hot oil treatment consistently give my curls shine, less frizz and nourishment. Share your favorite ways to do a hot oil treatment plus your favorite blended oils down below in the comments.

10 comments
1 FacebookTwitterPinterestEmail
Curly Hair Products Under $5

Curly Hair Products Under $5

by Rochelle October 4, 2019

Finding affordable curly hair products is not an easy challenge. Especially if the focus is organic and natural ingredients. However, if you’re willing to let some of the ingredients slide, there are plenty that do a fantastic job of defining, moisturizing, and smoothing out frizzy curls. Check out this budget-friendly list of 5 curly hair products under $5.

Herbal Essences Hello Hydration Conditioner

Herbal Essence Hello Hydration Conditioner

This affordable conditioner has tons of slip, a great coconut scent and made detangling so easy. After a co-wash with this there was noticebly less shedding. Additionally, it’s paraben, gluten and mineral oil free, color safe and infused with coconut extracts. Herbal Essence Hello Hydration Conditioner $2.99

Aussie 3 Minute Miracle Moist Deep Conditioner

Aussie 3 Minute Miracle Moist Deep Conditioner

An old time favorite is the Aussie 3 Minute Miracle Moist Deep Conditioner. It always had a way of making itself into my product rotation as a teenager then again after restarting my curly hair journey.

It contains aloe, jojoba oil and sea kelp it’s amazing because it provides quick moisture to my thirsty hair. For someone as limited on time like myself, 3 minutes is about all I have to contribute to deep conditioning. Aussie 3 Minute Miracle Moist Deep Conditioner $2.99

Garnier Fructis Sleek & Shine Intensely Smooth Leave-In Conditioning Cream

Garnier Sleek and Shine Intensely Smooth Leave-In

Another oldie but goodie is the Garnier Sleek and Shine Intensely Smooth Leave-In. Retailing at $2.99, this is designed for frizzy, dry, unmanageable hair. It contains argan oil and their Active Fruit Protein which is a combination of citrus protein, vitamins B3 & B6 and fruit and plant-derived extracts.

Eco Styler Professional Styling Gel Olive Oil Curly Hair Product

EcoStyler Olive Oil Gel

Love it or hate it, EcoStyler gel made the list. The jumbo size has never been necessary in my eyes but the 16 oz is more than enough and retails at only $2.99. The olive oil variation applies sticky at first but after air-drying it doesn’t flake, feel crunchy and made my curls tight and springy. The only con was the scent but that was personal preference.

Creme of Nature Perfect Edges

Creme of Nature Perfect Edges

An edge control with color? Sign me up! If thinning edges and gray hair are some of your problems, this is a quick and temporary solution. My normal go to has been Toppik Hair Building Fibers but it’s a bit pricier.

A helpful tip for edges is to apply further away from the hairline then move closer. This ensures that it gradually gets lighter like a natural hairline. Creme of Nature Perfect Edges can be applied with the fingers, a toothbrush or brush. Retails at $4.59.  

Share your favorite curly hair products under $5 down below in the comments.

1 comment
0 FacebookTwitterPinterestEmail
Wash N' Go with Innersense Beauty

Simple Wash N’ Go for Busy Moms ft. Innersense Beauty

by Rochelle December 4, 2017

Since having my son, simplicity has taken over in my beauty routines. It’s truly a treat when there’s time to deep condition, apply a face mask or polish to my toes. Needless to say, if I find a hair care system that’s quick and easy, I’m all over it. Recently, Innersense Beauty launched their I Create Lift Volumizing Foam and it sounded like the perfect styler for my simple wash n’ go and new busy life.

Why Innersense Rocks

Innersense has a great reputation for clean ingredients making it perfect for all hair types. However, it’s especially perfect for pregnant and nursing women concerned with what they are putting into their bodies. In addition, Innersense is cruelty free and always formulated without phthalates, ethoxylates, sulfates, silicones, 1, 4, dioxane, parabens, petro compounds, propylene and butylene glycol, PEG, MEA, TEA, MIA, artificial dyes, synthetic fragrance, gluten, or GMO’s.

Wash N' Go with Innersense Beauty

Shiny Bouncy Curls using Innersense

Wash N’ Go Must-Haves

Innersense Hydrating Cream Hair Bath: This deeply hydrating cream shampoo is enriched with sage essential oil and tamanu to help balance the oil on the scalp. Nourishing emollients soften and smooth the cuticle. The silicone-free formula leaves hair bouncy, without residue.

Innersense Hydrating Cream Conditioner: This silicone-free emollient rich conditioner moisturizes dry, coarse hair. Certified organic monoi oil and aloe strengthen the hair follicles, smoothes cuticles, and fights frizz while orange flower delivers beautiful shine.

Innersense I Create Lift Volumizing Foam: This lightweight styler adds texture, boosts volume,  and defines curls. It’s formulated with a blend of certified organic ingredients, aloe vera, honey, frangipani and lavender orange flower oil.

images of curly hair

simple wash and go for busy moms

My Three Step Wash N’ Go for Busy Moms

Step 1

Begin this wash n’ go by thoroughly saturating your curls with water. Add a small amount of the Innersense Hydrating Cream Hair Bath into the palm of your hands and work into a light lather. Apply to the scalp and spend a couple minutes massaging the hair bath into your scalp with your fingertips. Rinse well to remove all traces of the hair bath. If the buildup is heavy and time allows it, repeat the process.

Step 2

Next, apply a generous amount of the Innersense Hydrating Cream Conditioner to your curls from midshaft to the ends. Detangle using a wide-tooth comb, or shower brush. Leave it on the hair for 5 minutes to deeply moisturize and use that time to complete the rest of your shower process. Rinse thoroughly and blot hair dry using a soft T-shirt or paper towels.

Step 3

Lastly, add a few pumps of the Innersense I Create Lift Volumizing Foam into the palm of your hands and rake it through sections of your curls. For extra definition, twist individual curls with fingers and then scrunch with both hands. Add more foam as needed and let it either air-dry or use a blow-dryer with a diffuser attachment. Once hair is dry, gently shake out the roots and scrunch to break up the cast. Use a pick at the roots to add more volume.

If you’re new to motherhood and still trying to get the hang of things, share your simple wash n’ go for busy moms below in the comments.  

Watch the video here:

5 comments
0 FacebookTwitterPinterestEmail
Postpartum Hair Loss

My Postpartum Hair Loss & Shedding Story

by Rochelle November 2, 2017

As many mothers know, during pregnancy, you will be blessed with luscious, full locks of hair that will make you do a double take. Unfortunately, you are likely to lose a large portion of it after delivery when your hair returns to its normal growth cycle. My postpartum hair loss is in full effect since having my son. It didn’t start until about 10 weeks postpartum but it’s important to share my story to help the other mothers or mothers-to-be out there.

Why does postpartum hair loss happen?

The normal hair growth cycle begins with the anagen phase (the growth phase), the catagen phase (the transitional phase), and the telogen phase (the resting phase). It is at the end of the telogen phase that a new hair shaft will surface resulting in shedding. The increase of estrogen during pregnancy causes the hair to continue growing and the hairs that are supposed to shed remain in place which gives the appearance of fuller, thicker hair.

Postpartum hair loss happens because when your hair returns to it’s normal growth cycle, all of the hair that was supposed to shed suddenly sheds all at once. If you shed 100 hairs per day normally but don’t shed any for 9 months, do the math and imagine whats to come in your postpartum future. What I’ve learned is that it is totally normal and eventually your hair will return.

My postpartum hair loss story

Around 10 weeks postpartum, I noticed an excessive amount of hair coming out of my Wet Brush while detangling. Although it was expected, it still took me by surprise. Some might cringe over this next statement but I started collecting the shed hair to document my hair loss. The image below shows the average amount of hair loss I experienced from each wash day.

Postpartum Shedding

Postpartum Shedding

Along with the hair loss comes the emotions. How much hair am I going to lose? Will it ever grow back? What you don’t know is that over time, I’ve developed a thick skin because of a previous bout with traction alopecia. It’s haunted me for years from wearing weaves and high manipulation styles.

Postpartum regrowth plan

My main concern, even more than my hair appearing thinner, is preserving my edges. They definitely were hit hard and are now noticeably thinner. The one good thing is that during all of my time on YouTube, I have learned to bring them back from the dead. Some of those things include:

  • Continuing with my prenatal vitamins
  • Keeping my scalp clean by using a clarifying shampoo
  • Deep conditioning my hair once a week
  • Using a Q-Redew handheld vapor wand to open up the pores on my scalp
  • Including essential oils like peppermint and rosemary in my shampoo & stylers to promote growth
  • Nightly scalp massages using a carrier oil and a couple drops of essential oils (peppermint, rosemary & tea tree are my favorite)

Postpartum Hair Loss

Postpartum Hair Loss

A new technique that I’m going to include is the use of a derma roller. A derma roller is a handheld device that has hundreds of tiny needles and is commonly used to produce collagen on the skin. It is also said that its use can help stimulate hair growth. With my fear or needles, it sounds like the last thing I want to try. However, if it works it will be so worth the pain!

My postpartum hair loss case hasn’t been terrible considering my history. It’s now been 6 months postpartum and it has definitely slowed down. There is a noticeable improvement on my hairline and hair overall. In total, the experience lasted about 3 months and I’m finally feeling like myself again.

image of postpartum hair loss

What are your favorite ways to speed up your postpartum hair growth? Share with me down below in the comments…

Video: MY POSTPARTUM HAIR LOSS & SHEDDING | MEET MATTEO | DISCOCURLSTV

10 comments
2 FacebookTwitterPinterestEmail
Matteo & Mommy Rochelle

Pregnancy & Postpartum Update Weeks 36 & Beyond

by Rochelle July 27, 2017

So, I’m a little late for this update but better late than never, right? The reason being is that my water broke earlier than anticipated (although it’s totally normal week 39) and postpartum life has been a whirl wind ever since. Luckily, I’ve created some free time to update you via the blog and through my YouTube channel. Here’s how it’s going…

Pregnancy Weeks 36-39

The last weeks of my pregnancy were when things started to get a bit uncomfortable. Shortly after I started maternity leave, it started getting harder to walk. The extra weight made my feet start to swell more than before and I couldn’t walk or sit for long periods of time. In total, I gained 40 pounds with the last 10 happening during the last couple of weeks. The majority of my maternity leave was spent at the beach since flying to a destination was no longer an option. Also, my appetite was insane! You know those giant plates of food you get at Cheesecake Factory? Well, this girl was clearing them and made room for more.

37 Weeks Pregnant

Pregnant Fun In The Sun!

Notice the heading ends at week 39? As I said before, week 40 never happened because my water broke. Fortunately, at 39 weeks it’s still considered the safe zone for delivery. At about 1:30 a.m. while in bed sleeping, I felt what I thought was a giant baby kick. It woke me up but didn’t concern me. My husband arrived shortly after from work and that’s when I noticed the slow leak was happening. Although still doubtful, my instincts told me to go to the bathroom and that’s when I noticed a little bit of blood. My internal alarm went off and soon enough, we were off to the hospital.

Finally, around 8 pm my little man arrived (It’s a Boy!!!). He didn’t have a name for a couple days but we settled on Matteo and he’s literally a dream come true.

Want to read my previous pregnancy updates? Click here.

Postpartum Life

Postpartum life has flown by, except for the first month…that first month felt like it went really slow. We had a full crew awaiting our arrival that included my mother, sister, and in-laws over a span of three weeks. With all hands on deck, my husband and I were able to have meals prepared for us, take a shower, and get a nap in here and there.

Our days consisted of feeding, soothing and staring down our newborn with breaks in between to ice between my legs and spray myself down with Dermoplast. The nights were obviously sleepless but we were prepared for that. Although we were blessed with the extra help, it wasn’t a reality until they left and my husband went back to work full time, leaving me home alone with our son.

Postpartum Necessities

Dermoplast & Diapers & Pads, Oh My!

Postpartum Difficulties

The most difficult part of the first 6 weeks was breastfeeding. My expectations of breastfeeding with ease and saving money on formula quickly diminished after I left the hospital. While in the hospital, Matteo wouldn’t latch so it was advised to use nipple shields which helped tremendously. We took home a breast pump to help stimulate milk production but discovered I had a low milk supply.

Even with the pumping, every nursing tea, fenugreek, mother’s milk supplement, and oatmeal bars, it was still low. Supplementing with formula was a must so I continued to pump while adding whatever I could to the formula. After 6 weeks, only drops were being added to the formula bottle and it was getting to be too stressful.  My favorite thing about breastfeeding him was the bonding but we manage to still bond over a bottle.

Breast Milk

I only dream of producing this much now!

Our recent challenges now focus on sleep. When you’re sleep deprived you want so badly for your child to rest, not only for their benefit but for yours! Sleep training will eventually be on the agenda but for now, sleep research is the focus. The book, “Healthy Sleep Habits, Healthy Child“, has been helpful although I am still unsure if I will use the methods. At a minimum, it has given me perspective on why babies do or don’t sleep and how that affects them in the future.

Overall, being a mother has given me purpose and fulfilled a gap that has been missing in my life. Sure, my personal life has come to a halt but the trade off is so worth it! That balance will eventually return so in the mean time I plan to enjoy this thing called motherhood!

*Disclosure: I may earn a small commission for my endorsement, recommendation, testimonial, and/or link to any products or services from this website. Your purchase helps support my work to bring you more cool posts! All thoughts and opinions expressed here are my own*

Watch my Pregnancy & Postpartum Vlog below! 

2 comments
1 FacebookTwitterPinterestEmail

Temporary Highlights With Hair Flash Color

by Rochelle July 20, 2017

This post contains affiliate links, including my Hair Flash Color referral link. I may earn a small commission each time someone makes a purchase through one of my links, which helps to support my blog. Additionally, this product was sent complimentary of Hair Flash Color. All opinions are honest, my own and I’m so excited to share them with you. 

Since having my little one, leaving the house can be a challenge. I’ve desperately been looking for a new look but haven’t had a minute to myself. With the weather warming up, I thought adding temporary highlights would be a quick way to change up my hair in minutes. Unfortunately, not all temporary color is created equal. Hair chalks don’t last on my hair and most colored hair sprays leave my curls crunchy. Luckily, I’ve discovered Hair Flash Color which has completely changed my opinion on temporary color.

What Is Hair Flash Color?

Hair Flash Color is a 2-in-1 temporary hair color and hair care formula that contains antioxidants, UV protection, hydrating natural ingredients, and natural mineral pigments. It can be used to add temporary highlights, touch up and cover roots, add a new color, and protect and nourish the hair. Plus, it washes out in one shampoo making it perfect for special occasions.

How To Get Temporary Highlights With Hair Flash Color

To get natural looking highlights, choose a shade that is 1 to 2 shades lighter than your hair color. For my dark brown hair, the shade Light Brown worked best. Cover shoulders with a towel or cape. Section off the top half of your hair and secure with an elastic or clip. Shake the can well and spray the tips of your ends on the bottom section. Release the elastic or clip from the top half and spray random sections of hair to create natural highlights.

Hair Flash Color Temporary Highlights

My hair before Hair Flash Color

To my surprise, my hair was soft to touch and after letting it dry it didn’t rub off on my clothing. This has been my favorite temporary color to date and my only suggestion to this company is to create a larger sized can for more use.

Hair Flash Color Temporary Highlights

My hair after Hair Flash Color

Watch the Full Tutorial Here:

What are your thoughts on this color? Let me know down below in the comments.

Want to try Hair Flash Color? Use my discount code for 10% off your next purchase: B10DISCO

Visit http://www.hairflashcolor.com

Visit Hair Flash Color YouTube here

temporary highlights on curly hair

0 comment
2 FacebookTwitterPinterestEmail
Pregnant Belly

PREGNANCY DIARY FROM 26-33 WEEKS

by Rochelle April 5, 2017

They say distance makes the heart grow fonder. Let’s hope that’s the case with my long absence. My pregnancy diary is definitely spread out but hey, that’s what happens when narcolepsy kicks in during the third trimester. Things are definitely becoming more challenging during this stretch so let’s review what’s been happening.

More Body Changes

The most obvious change is my growing belly. It’s still on the rounder side just a lot larger. In addition, that seems to be the only thing growing on me. Sure, my thighs and bust size has increased but not nearly to what I imagined. Since I have no idea what the sex is of our child, I turn to old wives tales. From what I’ve heard, if you are all belly you may be carrying a boy and if you’re having a girl your body widens. Who knows if that’s true but I do find it interesting.

Additional changes include the darkening of my skin. My areolas, linea negra, and underarms have seen the most change but it is very common during pregnancy. My navel has officially popped out but luckily no visible stretch marks have shown up, partly because of my belly care regimen. Want to see how the first 32 weeks went, click here. 

My Belly Care Regimen

My mother had 5 children and proudly wears her stripes. I’m not sure if she had them from baby number one or if it happened later but I’m doing everything in my power to avoid them. I won’t be embarrassed or ashamed if I get them but if they can be avoided, I’m gonna try.

Mustela Maternity

#SecretWeapon With Mustela

Around the second trimester, when my belly size increased, Mustela sent a few products my way to try out. It included the Mustela Stretch Marks Prevention Oil & Cream as well as the Bust Firming Serum. Twice a day, I apply the Stretch Mark Prevention Oil or Cream to my belly, thighs, and butt and I apply the Bust Firming Serum in the morning after my shower. To my surprise, this line has a lightweight texture that absorbs quickly. It also has a fresh, floral scent that’s not overpowering and safe for baby. So far, not a stretch mark in sight and I’m hoping it stays that way. *These products were gifted to me free of charge as part of the Preen.Me VIP program together with Mustela.*

Must Have Clothing Items

As your body changes, so do the size of your clothing. My most important purchases have been soft bras with no underwire or sports bras. Unfortunately, I missed the boat on another necessity for your bras, bra extenders! Had I purchased one, I may have worn the bras for a longer period of time but I skipped them and went straight to a sports bra once I realized I couldn’t breathe anymore.

Another must have splurge were a pair of comfortable wedge slip-on’s. The extra weight has been killing my arches and heels and investing in a pair of flats with a small wedge has made all the difference in my work day.

Diet & Exercise

My appetite has definitely increased! During my second trimester, the baby was so high that anything I ate made me feel full quickly. It was extremely uncomfortable until the baby dropped a little. Then it was game on and I’ve been stuffing my face like a champ ever since. As far as what I’ve been eating, consider everything! I stay away from the usual suspects, raw meats, sushi, unpasteurized dairy, and deli meats but I do crave red meat and anything with peanut butter. I struggle to get my greens so one way I’ve included them is by preparing a smoothie in the morning with a banana, frozen berries and a handful of spinach.

Pregnancy Diary

Don’t Tempt Me, I Will Eat It All!!!

Staying in shape has been another struggle but I manage to get in a 30-minute walk a few times a week. If I really have time on my hands, I visit the gym to do weight training (with much lighter weights) a couple times a week. More recently, I’ve included prenatal yoga which has been a God-send for my achy body.

Hopefully, the next pregnancy diary will happen before the baby decides to arrive. It would be a shame to not update you all with the last few weeks, especially since that’s when all the fun happens (that was a joke). I’d love to hear from all of my pregnant mamas about how your pregnancies are going. Leave me a comment and tell me about your cravings and must have maternity clothing items.

Watch my latest pregnancy vlog here: 

*The Mustela products were gifted to me free of charge as part of the Preen.Me VIP program together with Mustela. All opinions reflect my honest opinion and are based on actual product use* 

2 comments
0 FacebookTwitterPinterestEmail
DevaCurl Buildup Buster Launch

DevaCurl Buildup Buster Launch in NYC

by Rochelle March 14, 2017

Last month, I was invited to NYC with a bunch of other curly influencers for the DevaCurl Buildup Buster launch. It felt like the trip of a lifetime because not only did I get to experience this innovative new product but I met so many of my curl sisters from the online world. Here’s a recap of my two amazing days in NYC.

Day 1: Check in & Workout?

DevaCurl was so amazing for setting this trip up for us all. Many of us flew in from all corners of the country and some internationally. We checked into the hotel and were greeted with a goodie bag filled with a little swag and our itinerary. I was already prepped for the first activity which included a high-intensity dance cardio class at 305 Fitness. With no plans to actually take the class (because I was 6 months pregnant), I still dressed the part and filled my water bottle up to watch and laugh at everyone. But…

Rochelle Masella & Jaime Linn

Meeting My Online Friends IRL

something happened when I got there, I saw Beyonce art plastered on the wall and heard the music blasting. My inner Beyonce wanted to come out to play…just at a lower intensity. I really needed to work out because I had been slacking so I stood in the back of the class and two-stepped my way through. Had I participated like the others, I may have delivered right there on the floor. Luckily, I knew that I had to listen to my body, take frequent breaks, and drink lots of water. We celebrated with a vegan meal at by Chloe and then I was off to bed.

Day 2: Devachan Salon & DevaCurl Buildup Buster Launch Party

Our next day started with a day at the Devachan salon for the ‘Bounce Back” service. After grabbing a quick breakfast, I was greeted by Smadar, my hair stylist and she took me back to the shampoo bowl where I was introduced to Buildup Buster. After a night of breaking a sweat, it made complete sense to me to have this service. Buildup Buster is a micellar water cleansing serum that uses micellar technology to remove buildup from products, hard water and other environmental stressors. She explained how Buildup Buster is similar to a clarifying shampoo but doesn’t strip the hair. Instead it leaves the hair soft with the help of abyssianian oil and jojoba esters. It can be used weekly instead of shampoo and should be followed up with a conditioner like DevaCurl One Condition.

After receiving my treatment, it was off to the chair where she used the DevaCurl Frizz-Free Volumizing Foam and DevaClips to bring volume to my roots. After my curls were dried, she finished off with a little spritz of the DevaCurl Flexible-Hold Hair Spray. My curls had tons of volume and they were party ready!

DevaCurl Buildup Buster

Later that night, we attended the Buildup Buster Launch Party. It was held at the beautiful Root Studios and I was in complete awe of all the curls in one room. There was a photographer, a slo-mo camera, a green screen station and Shake Shack ( I have to admit that got me really excited). I gravitated to the slo-mo camera because I always wanted to star in my own hair commercial (who doesn’t). In addition, a group of us jumped into the green screen station to create our own Buildup Buster commercial. Most importantly, I had the opportunity to meet some of my favorite curly influencers and turned my online friends into real ones.

Big thanks to the team at DevaCurl for this opportunity! It truly was an amazing trip that united my curly sisterhood.

Have you had the chance to try DevaCurl’s Buildup Buster? Let me know how it’s working for you down below in the comments…

Watch the vlog from my trip to NYC:


0 comment
0 FacebookTwitterPinterestEmail
Heatless Blowout

Heatless Blowout | From Curly to Straight

by Rochelle March 7, 2017

Have you ever wanted a blowout without the heat damage? Well, I have a solution that works well on naturally curly hair as well as relaxed hair.  In fact, this is something I used to do frequently when my hair was relaxed to keep a straight style throughout the week. This heatless blowout technique is essentially the same but slightly difficult because of the texture of curly hair.

Heatless Blowout

One of the most important elements of this process is to start on clean hair. Especially if your hair is on the fine, curly side. Use a clarifying shampoo to remove all traces of buildup and dirt on the hair and scalp. Follow up with a moisturizing conditioner and be sure to detangle and rinse well. Blot dry your curls with a t-shirt or paper towels.

How to Wrap Your Hair

Using a wide tooth comb or Wet Brush, detangle the hair one more time. I can’t stress enough the importance of detangling your curls before the wrap technique. It will make the process much smoother. Next, apply a generous amount of Jane Carter Solution Wrap & Roll to your curls and distribute well using a Wet Brush.

Now it’s time to section the hair. The length of your hair can help you determine where your part starts. If your hair is chin length or shorter you can probably start with a deep side part. However, if your hair is longer starting your part behind your ear will be beneficial to keep it flat and smooth.

The key to wrapping is to think of it as one continuous circle. After you’ve created your part, begin brushing the hair flat against the scalp from the front, along the forehead, and behind the ears. To keep the smoothed hair in place, secure with flat duckbill clips and then continue with the wrapping. If you can see or feel bumps, use a rat tail comb to smooth it. When you’re finished, it should resemble a beehive that is laid flat along the scalp. Add flat duckbill clips to ensure that it stays in place.

heatless blowout on curly hair

Overnight/Next Day Care

Next, use a silk or satin scarf to tie down the style and go to bed. It’s very important that you give yourself plenty of time for this to dry otherwise you will end up with random curls and waves. Once your hair is 100% dry, take off the scarf and remove the clips. Using a wide tooth comb, gently unravel the wrap and comb through the hair.

For a visual demonstration, check out my tutorial below. Let me know what your favorite heatless blowout technique’s are below in the comments. 

0 comment
0 FacebookTwitterPinterestEmail
Pregnancy Diary

Pregnancy Diary From 0 to 25 Weeks

by Rochelle March 1, 2017

For those of you following my pregnancy journey, I felt it was best to document what I could through my blog and video. Since I’m starting late on this, this pregnancy diary post will begin at 0 weeks and go to 25 weeks. It will briefly cover my how I knew I was pregnant, body changes,  and maternity clothing.

How I Knew I Was Pregnant

Shortly after my husband and I started trying, I went to a California Fish Grill to enjoy a bowl of clam chowder and a fish plate. I love fish and was beyond excited to give this restaurant a try. After diving into my first spoonful, I noticed something strange. The clam chowder tasted off. Some people would have stopped there but I tried a couple more bites to make sure I wasn’t crazy. What I was tasting was metallic.

Immediately, I knew that meant one of two things. Either the chowder was truly bad or I was pregnant. I had read somewhere that if fish has a metallic taste it could mean your pregnant. Needless to say, I’ve always kept that in the back of my mind. I glanced at the other tables surrounding me with a bowl of chowder. They licked the bowl clean. Maybe it was just my imagination or the seasoning was off. I stopped eating it just in case but moved onto the fish. No metallic taste there. Probably because it was smothered in lemon, butter, and garlic.

I felt confused but very curious. I called my husband to tell him that my chowder tasted funny and maybe I was pregnant. On my way home I grabbed a pregnancy test and sure enough,  I was.

Pregnancy Diary 1st Trimester (0-12 Weeks)

Grateful is the word that I think about often in regards to my first trimester. No serious nausea, no vomiting. I did experience bloating, however. Almost immediately after I realized I was pregnant, my pants became tight instantly and within a month I was using a rubber band wrapped around my buttons as a relief.

I say “serious nausea” for a reason. I didn’t experience much until my 12th week. All of a sudden, the taste and smell of ground turkey was so gamey and strong and I couldn’t eat it. The same went for red meat. Luckily, that feeling only lasted that one week and then I went back to eating as normal. My only craving was fresh fruit, anything artificial didn’t appeal to me.

Pregnancy Diary

2 Months Pregnant


Pregnancy Diary 2nd Trimester (13-25 Weeks)

Yes, I realize the 2nd trimester lasts until 28 weeks but at the time I filmed my pregnancy vlog that’s where I left off (See link below). During this time, we let both of our families know that we were expecting. Both families were over the moon and filled with questions. Boy or Girl? Who’s your pediatrician? Why aren’t you registered? The truth is, my husband and I had no answers for them except pure joy. We weren’t concerned about the sex, the pediatrician or a baby registry. We only cared about a healthy pregnancy that results in a healthy child.

My tummy was slowly growing and eventually, it was time for maternity clothing. My sister took me shopping and our focus was bigger underwear, bras and maternity pants. My rubber bands were snapping and it was time to invest in the right pants. My underwear was cutting off my circulation and my breasts were spilling out of my bras. Luckily, Target and H&M had maternity sections that were helpful during this process. Check out “Slayternity: Dressing the Bump Without the Frump” to see some of my maternity styles. 

Besides my growing belly, my only other complaints were of round ligament pain. Right above the right and left side of my pelvis were the occasional sharp pain. My doctor told me there was nothing to be worried about as this is part of the process. It is a bit scary at first as I had no idea what to expect. It also only happened on certain weeks.

Want to see how week 26-33 went? Click here for pregnancy vlog #2

Watch My Pregnancy Vlog here: 

Share your pregnancy story with me below in the comments…

1 comment
0 FacebookTwitterPinterestEmail
Newer Posts
Older Posts

Newsletter

Keep in touch

Instagram Pinterest Youtube
discocurldesigns - Etsy
Shop Curly Hair Merchandise by discocurldesigns located in LA, California.
  • Facebook
  • Twitter
  • Instagram
  • Pinterest
  • Youtube
  • Contact
  • Privacy Policy

© 2016-2023 DiscoCurls.com. All Rights Reserved.


Back To Top
DiscoCurls
  • Home
  • Curls
  • Beauty
    • Makeup
    • Skincare
    • Nails
  • Style
  • Lifestyle
    • Pregnancy
  • Videos
  • Contact
  • Resources
    • FREE Curly Hair Product Tracker
  • YouTube
  • Shop
    • Amazon
    • Etsy
    • Teespring Store
    • ObsessedWith.It
  • Links

Shopping Cart

Close

No products in the cart.

Close